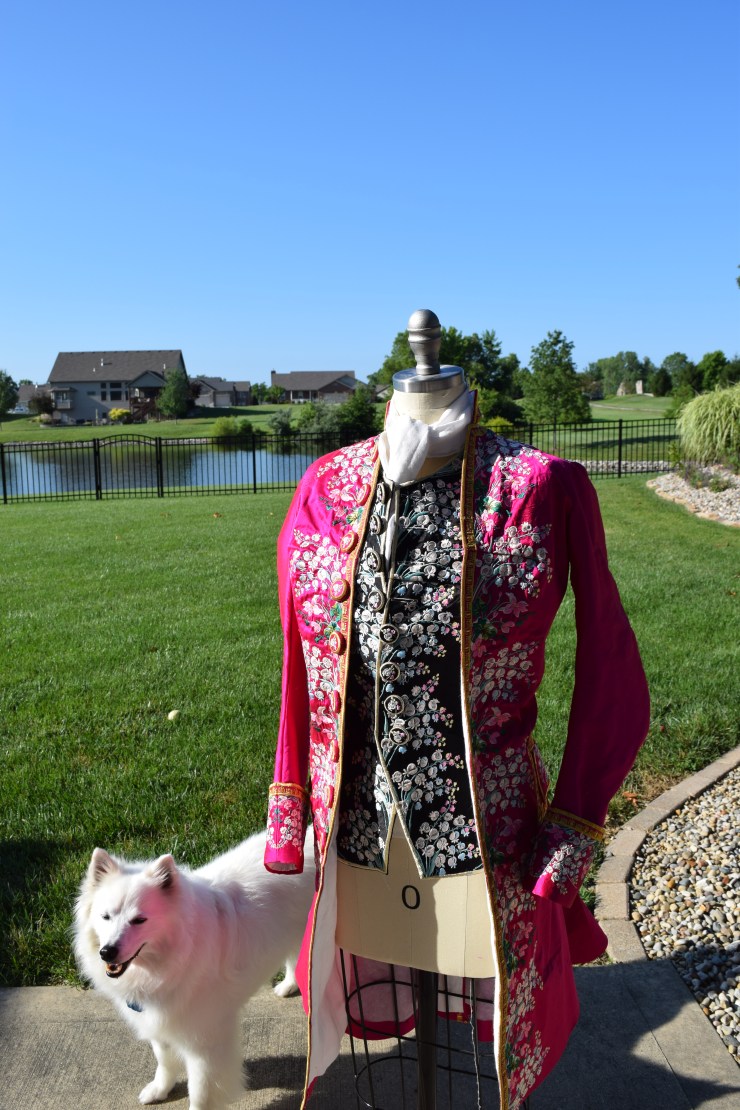
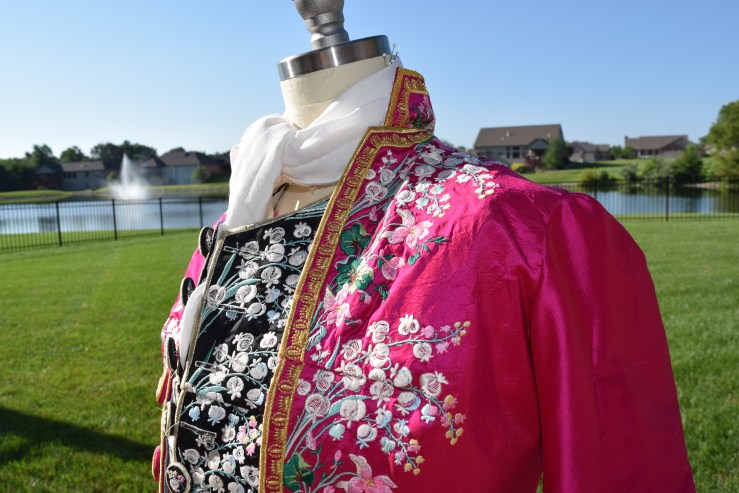
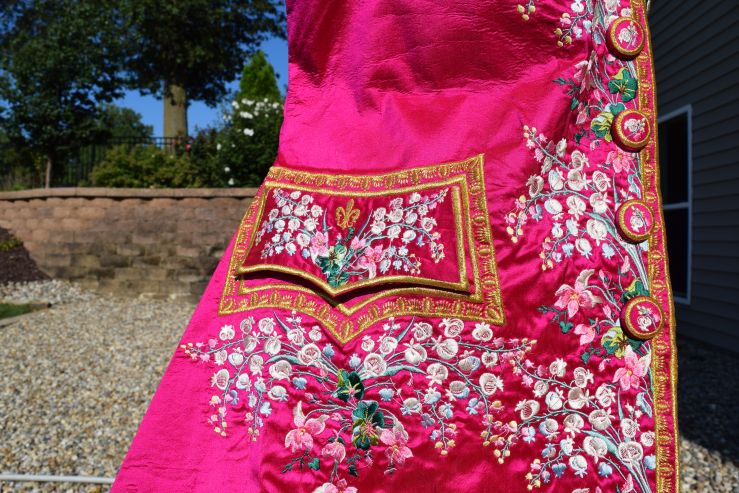
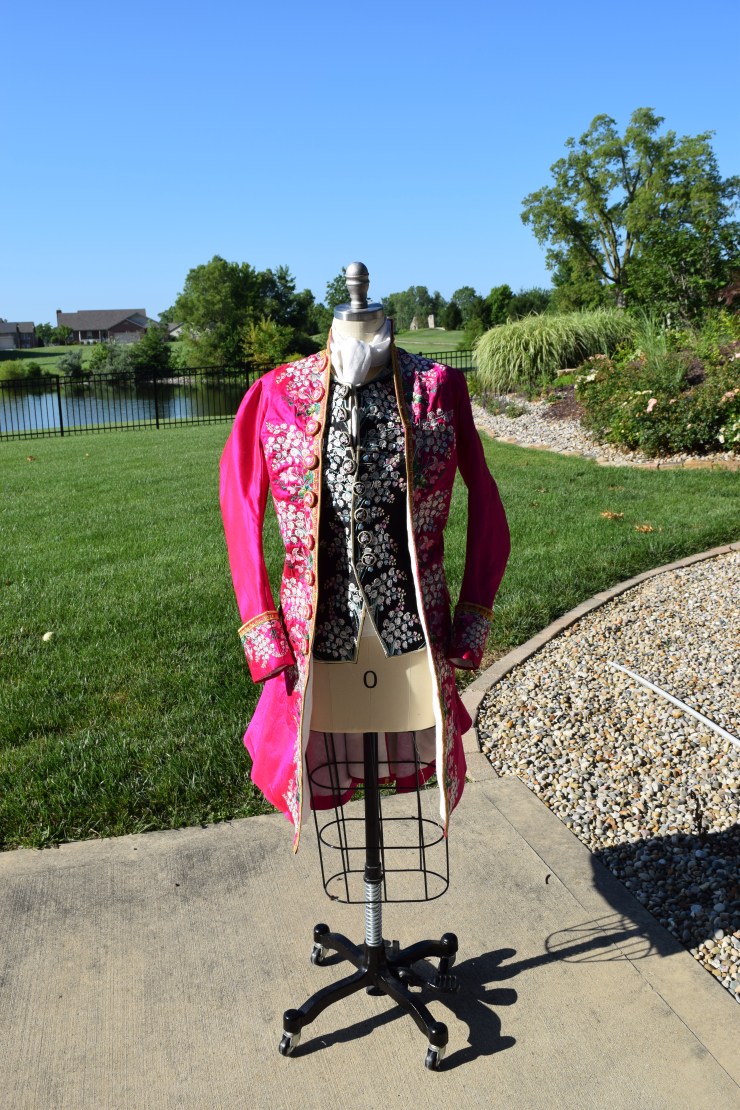
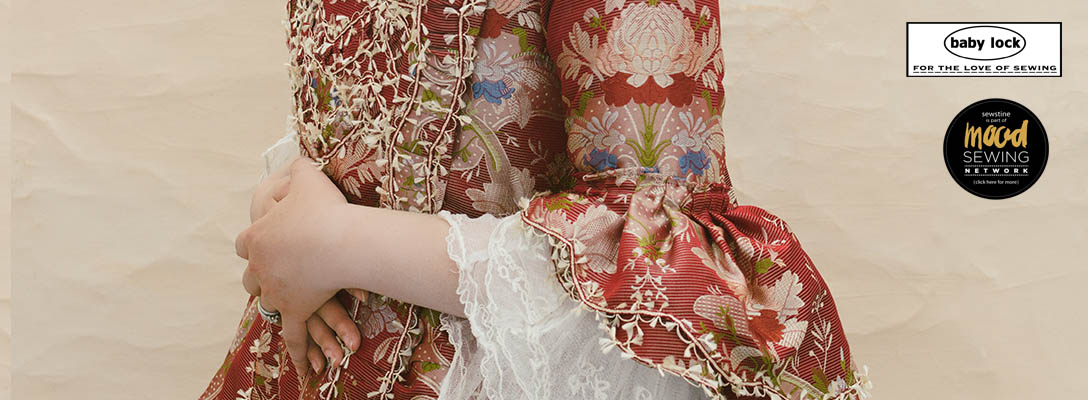
I really felt like my last post’s pictures didn’t do much to capture how absolutely, shamelessly, overwhelmingly PINK this coat is. So here are some better photos. 🙂
NOW time to start my next project.
I really felt like my last post’s pictures didn’t do much to capture how absolutely, shamelessly, overwhelmingly PINK this coat is. So here are some better photos. 🙂
NOW time to start my next project.
Frock Coat
Embroidery of the frockcoat started well; I started on the back 2 panels, and loved the way it came together there. The right front panel was done. Then I messed up the left front panel. Redoing 6 panels of embroidery cost me approximately $100 in thread/silk, and put me a week behind schedule.
As for the embroidery of the coat itself, after much experimentation, I came up with a way to stiffen the silk taffeta enough to not pull too much with the heavy embroidery. I ended up backing the silk taffeta with a layer of iron on adhesive, and then a layer of pellon polyester interfacing. Of course this made the coat profoundly stiff, but did stand up beautifully to the embroidery, not pulling much at all. Tradeoffs I guess. I did attempt to do cotton interfacing but could not find a good one that worked as well as the polyester. It broke my heart a little to have to give up and use polyester, but… I guess if I were in the 18th century, I would go with whatever looked best too! Bah!
Unlike a lot of my friends, I am a profoundly slow seamstress and tend to stress myself out when I get too close to a deadline. Due to having to redo the left front panel of the coat, I actually finished 2 days prior to leaving for CoCo 2017. Many thanks to the hubby for providing me wine and vodka when sewing got stressful.


I did to go to a LACMA exhibit on men’s clothing, (on loan from the LACMA but at the SLAM in St. Louis) and got to see several frockcoats in person. One thing I found to my surprise was that the coats were lined to the edge with linen! I was absoulutely thrilled to find that out – what I had done to my coats out of sheer laziness, was actually being done by the actual people of the 18th century!


I was absolutely blown away by this coat in particular. This is what I want to do for my third coat. (Most likely for the hubby since he looks so pretty in them.)
In any case, I took the easy way out and ended up iron interfacing the hem along the bottom of the frock coat. Not only did the iron on adhesive glue give me no stitching across the end for a clean look, it also stiffened the bottom giving me a beautiful sway with the coat. Iron on adhesives man. Amazing. If they had that technology in 1740 they would have used it. Along with iron on adhesive. And epidurals for labor. Just saying.
Waistcoat
Similarly, I ended up sewing the hem to the edge with no facing. I did put in machine made button holes; but may I say, unless you’re super confident with button holes to do machine ones? I find that the machine embroidery tends to unravel rather obscenely.
So note on button making:


Shirt
I sewed my shirt using Larkin and Smith’s instructions. It was awesomely fun and easy though incredibly time consuming. I’m kind of done with shirt sewing for a good year or two. Some pictures of the shirt pre-ruffle. I did do the stitch everywhere I could because the stitch was PRETTY. 🙂


Breeches
Breeches were done using the JP Ryan pattern. I made no adjustments on the muslin other than removing 1″ of bulk from the back of the pants. I also changed the instructions by flat lining my silk taffeta as the fabric seemed incredibly thin. 5 stars out of 5. 10 out of 10 Stines would use this pattern again. My one suggestion – follow the instructions to the letter. They are GOOD.
Stockings and Shoes
Burnley and Trowbridge stockings worked beautifully, albeit a bit large for me. I used American duchess shoes, though I wish I purchased some more glittery shoe buckles. Next time I guess. 🙂
Finished pictures:


Overall, I can honestly say that I LOVED making and wearing this coat. It was honestly a giant blast to make – especially since I gave myself two full months of just working on this. It was also my most comfortable costume by FAR. No corset, comfy linen shirt, comfy linen pants, and great range of motion. I mean, I know that we’re trying to take back the corset by dispelling the notion that everyone tight laced and women were fainting left and right – and it’s true! Corsets are not the monstrosity everyone claims they were. That being said, OH MAN THIS WAS COMFY. There is something to be said for full range of motion of legs, arms and body.
On top of it, I just find machine embroidery and sewing to be incredibly relaxing, especially after a long day (literally, 24 hours at a time) of work. So highly recommended as a hobby.
Now, time to get Duran Textiles to respond to my messages so I can get started on Frock Coat #3!
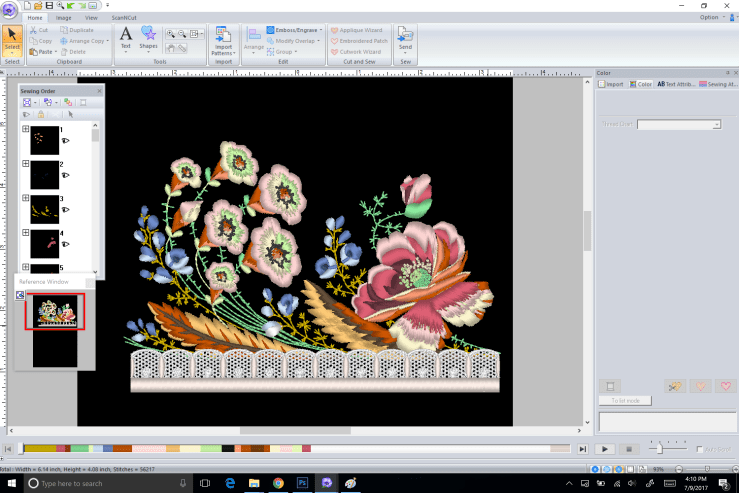
I fell in love with this embroidery the moment I saw it on Cooper Hewitt’s website.

I loved the softness and femininity of the flowers, and I thought it would be the perfect feminine piece to use for my frock coat for women. This is where the talented Cari from Cabbit Corner Embroidery came in. I ended up commissioning her to convert it into machine embroidery.


Believe it or not, she did this entire conversion by hand. I think she tried the wizard converting tool after converting the original into an AI vector file, but I agree with her – it never turns out quite as good as you want it to. So she did the entire thing by hand. Absolutely meticulous and brilliant work!
So first thing I did was print it. You can see my beloved VE 2200 at work here.
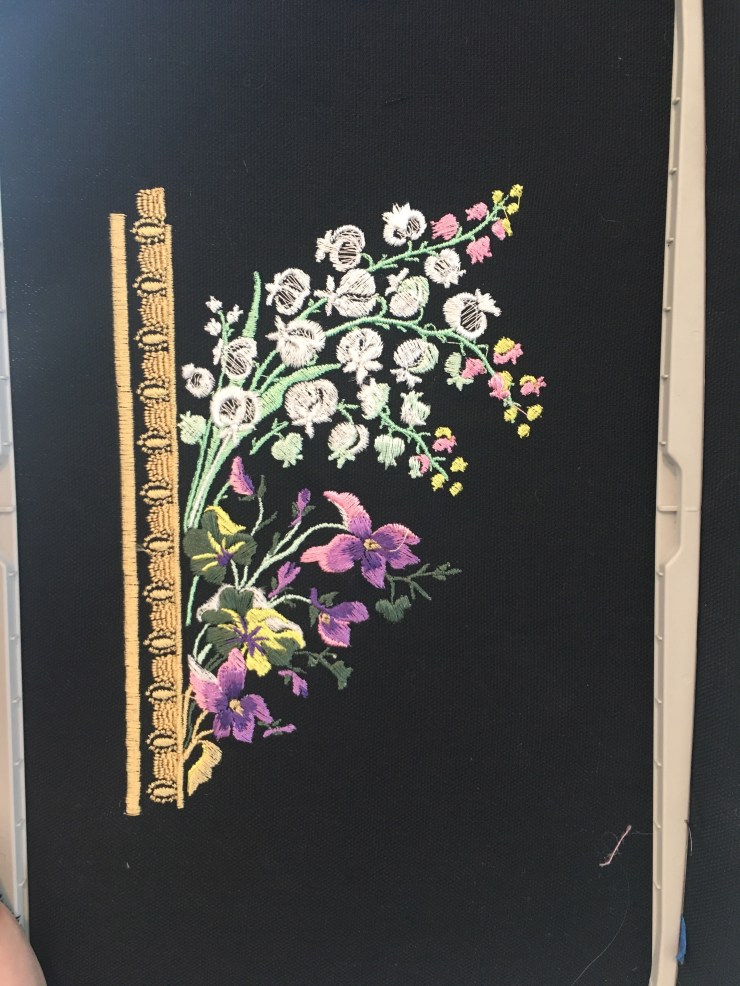
This is how the first draft looked printed with rayon threads on some black wool broadcloth. I frequently use wool scraps as I don’t need to interface the fabric, thereby making things theoretically easier.
I chose a pink silk shantung in hot pink for the base fabric. After that, it was just experimenting over and over with different colors on different backgrounds until I found the perfect one!


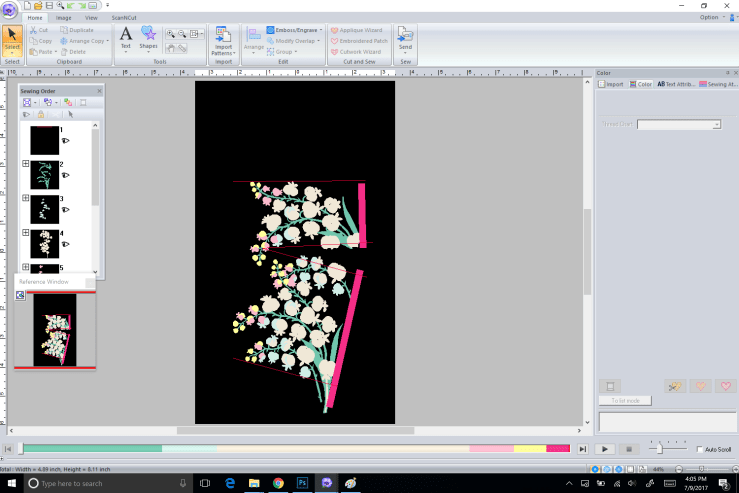
After picking the colors, I went ahead and started positioning the repeated design on the actual pattern. After scanning the muslin pattern, complete with grid lines, I went ahead and uploaded it into my program – PE Design 10.

")
")
")
")
")
After uploading the pattern piece into the software, resize it so that the ruler fits with the grid lines appropriately. This is very important as you do NOT want to print your pattern and then find out that your waistcoat or coat doesn’t fit!
When you start with your pattern, I high recommend starting with the border. The border will take the longest time. In this case, I got a repeat of one section and copy pasted and changed the angle along all the curves, and positioned one after the other like so. I actually printed one, realized I wanted my border bigger and had to redo it. Overall, I think I spent around 12 hours just resizing the border of the pattern, over and over again.
After the border was in place, I lined it with the curve lines. Most software has a curved line tool and that proved very useful. My solid lines are usually 0.22″ but you can use whatever you find fits your frame and sewing preference.
AFTER that, I went ahead and positioned the flowers. I recommend doing a little bit at a time. Personally, I resized my flower pattern about three times before I was happy with the size. I would print a sample embroidery, using a monocolor version of my pattern (for speedy printing and to avoid 22 color changes), to make sure I liked the size. (To print a monocolor version of your pattern, copy paste the original file, rename it with the word ‘monocolor’ at the end, open up the file, select the whole image, and make it one color. Then save to your flash drive, print to test your image really quickly)
Just saying, my final version of the flowers were 33% bigger than the original.
Some tips:
The very first thought I had after seeing my husband in his new frock coat was “Damn… I want one too.”
I feel like I need to say this very clearly – I was not going for historical accuracy with this outfit. I don’t think it’s possible to make an HA frock coat, breeches, waistcoat set FOR WOMEN. I don’t think I’ve ever seen one, but I would LOVE TO. (If anyone knows of a suit for women, with breeches from this era, please link me STAT.)
So for this, I elected to do a 1740’s frock coat, since 1. I haven’t done that pattern yet so it would be fun and 2. I LOVE that heavily pleated back.
Step 1: Drafting the Pattern
Frock Coat:
Personal philosophy: I don’t draft a pattern I can just as easily buy. I suppose I could spend time drafting patterns from books, but if there is a ready made pattern that fits me perfectly right away, I’d rather just buy it. It might seem silly, but time is money, and muslin is money, and if buying a frock coat pattern will save me 6 hours? I’ll do it!
I did buy JP Ryan’s frock coat pattern but after making the muslin up, I can’t say that I loved it. It was a fit problem, and I deep down, I wanted the fuller back that’s from the 1740s. At this point, I bought a pattern from reconstructing history. Again, their pattern was definitely not suited for someone of my size, so I ended up using some of their design ideas, but ended up using it as reference to use the draping method to cut my own pattern. So there goes my idea to save time and money.
I usually start by making a set of lines on my dummy then stretching the muslin across to make forms. I then make a blockier form bilaterally, in order to make sure that I can put it on. I then star tweaking one side more than the other. In this case, I started editing the left side of the jacket. You’ll notice that the right side of the coat is sleeveless, collar-less, and dart-less.


I did make the decision to put in a horizontal dart along the bustline. I did this as 18th century women’s riding habits tend to have that horizontal dart, and I wanted to follow that trend. Also, darts do a lot to make this coat better fitting.
After all this, I came out with several pattern pieces. Note that some pieces have seam allowances and some don’t. I tend to label and mark everything as much as I can so that there are never any questions afterwards. I also highly recommend putting in a horizontal as well as a vertical ruler with marks on the inch or the cm. I’ll discuss this more next time when I talk about how I put in the embroidery to attach to the curve.


Overall, I ended up cutting about 3 coats out of muslin before I came up with my final design. I am pretty sure this just shows how amateurish I am, but on the plus side, I hope this is encouraging for all those people who’s first muslins suck.
Waistcoat:
I did end up cutting my own waistcoat as well using the draping method. In full disclosure, I did decide to use the pocket from a riding habit waistcoat pattern I had bought previously from Mill Farms, but otherwise the coat was entirely drafted by me. Also decided to put in front darts.

You’ll notice from the scans that I only scan in the part that I plan on covering with embroidery. Obviously that’s for a very good reason. 🙂
Drop sleeve shirt:
I LOVE me some delicate hand sewing here and there. There’s no way I’d want to do everything by hand for everything I sew, but every now and then, I love cuddling up on the couch with my husband and my dogs, with an awesome epic or video game speed run, and sew myself something. In this case, I chose to do the shirt entirely by hand.
If you too decide to do this, I can’t recommend At the Sign of the Golden Scissors more. Their shirt kits are not only cheaper than buying linen, but it comes with thread, wax, instructions and sometimes even buttons! I went ahead and got a kid and started sewing.
Breeches:
I confess I’ve never made pants for a woman. Well, I’ve made pajama pants, but that hardly counts since nothing is made to fit. I had used JP Ryan’s breeches pattern for my husband’s frock coat and loved it, so I went ahead and decided to use it again. I bought it, made a muslin, fitted it to me (I ended up taking a few inches off the back bum area and 1/2″ on each of the legs, but otherwise, no major changes), and sewed it. I would show pictures, but honestly, the muslin was unremarkable and just terribly immodest so I’ll refrain.
Anyways, after getting all these patterns done, I went ahead and started to scan them in and re-piece them together on my adobe Photoshop. The ruler that I put on it was incredibly useful there. I guess I could go into how I put it together, but I’m fairly sure I do it the most inefficient way possible.
Next time: Step 2: Preparing the Embroidery
As wonderful as I find HA (Historically Accurate) to be, I don’t know if I have it in me to be completely HA. For one, I like using modern techniques because deep down, I think if 18th century people had access to what we do now (like sewing machines, and the joys of flat lining), I think they would have used it.
Furthermore, I love mixing and matching different eras and my favorite parts from one era, and bits from another era. (Ie: I love the ruffled edging of a 1770s gown, but I prefer the trim of 1750s gowns more.) I hate following the rules too closely. But I digress, what I mean to say here, is that I don’t think it’s necessarily awful to use modern techniques to make 18th century clothing.
In terms of the gorgeous, embroidered frock coats of the 1770s, I love using my embroidery machine, and I don’t think of it as cheating. I certainly don’t have a workshop full of apprentices waiting to embroider my pieces!
In any case, this is how I made the embroidery for my frock coat. By “me”, I do refer to both the incredibly talented Cari at Cabbit Corner Embroidery as well as myself.
It started last August, when I hired her to convert this embroidery piece from Copper Hewitt (btw, which is technically public domain), into a PES file for my Brother VE2200.


I did ask for the flowers from the one on the left, and the border from the other. (I love that lace border!) I did not realize at the time, that in the 18th century, they would get a piece of netting, sew around it and then trim it afterwards and not embroider the whole darn thing! Cari spent a long time converting that lace into a machine sewable piece. This was rather problematic because it meant that each 1″ of lace had approximately 1500 stitches, but more on that in a later post.
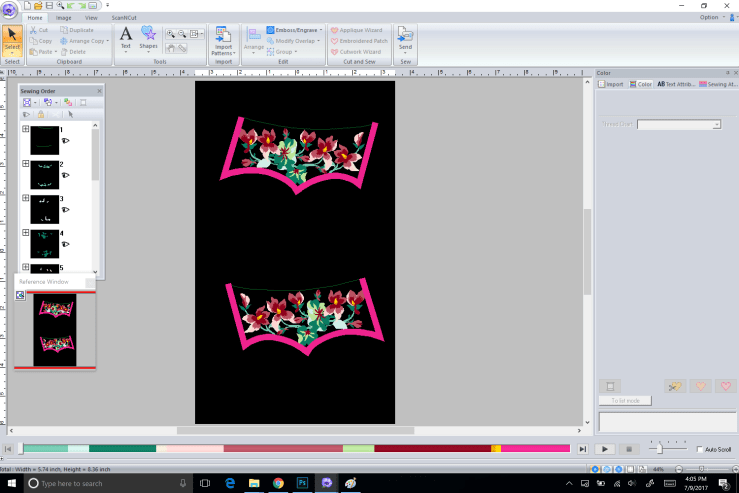
Once she converted the embroidery, it looked like this:
I initially made some practice embroidery with rayon threads on some pieces of fabric lying around the house. Around fifteen attempts later, I had selected the final colors for my embroidery. They were similar to the original, but I selected a very bright hot pink silk thread for the flowers. I’m pretty sure that that color didn’t even exist in the 18th century… but again, I’ve never felt obliged to be completely HA!
Meanwhile, I had worked out a frock coat pattern that fit my husband about six months earlier. I had started with JP Ryan’s frock coat pattern, but finding that my husband had a very different build from her pattern, I recut the pattern significantly. I scanned the piece in on my 10×14″ flat bed scanner and regrouped the piece on adobe photoshop.
My pattern looked much like this. I highly, highly recommend putting a ruler on your pattern piece before scanning it. It allows you to have a way to scale this pattern piece in whatever software you’re using to add the embroidery. I made a point of putting the seam allowance in black and the actual pattern piece in pink. While I had initially put in lines of how I planned to break up the pattern piece, I came to realize this was unnecessary so please ignore those silly boxes.

To be honest, the first frock coat I made, the placement was done by Cari. While I had made the pattern piece and sent it to her, I feel uncomfortable sharing pictures of her hard work. I understand that she must have spent over 20 hours working on placing the lace and design for the coat. So from here on, I’ll show my own work that I did on placing the designs for my waistcoat. You’ll notice that this waistcoat has horizontal darts since it’s meant for me, a female.

So here is my waistcoat design that I made from pictures from books and draping. You can see that I just scanned in the muslin piece itself. Not the most attractive thing to look at but it did the job. I imported this image into PE Design 10, which it allows you to do, and copy/pasted the embroidery onto it. After about 5 hours of this, I had the design set.
")
")
")
I’m kind of glossing over this part here because figuring out the design and placing it, while important, is a matter of trial, error and artistry. I usually sized the border as 0.22″, and made it a very bright color with pop so I could never forget where it was.
After this was done, I went ahead and broke it into pieces sized for my embroidery frame (12″x7″ for the Brother VE2200. I hear some people have frames as large as 14″x9″- SO jelly!). I highly recommend putting lines on the top and bottom that you can place first to help line up the design perfectly.

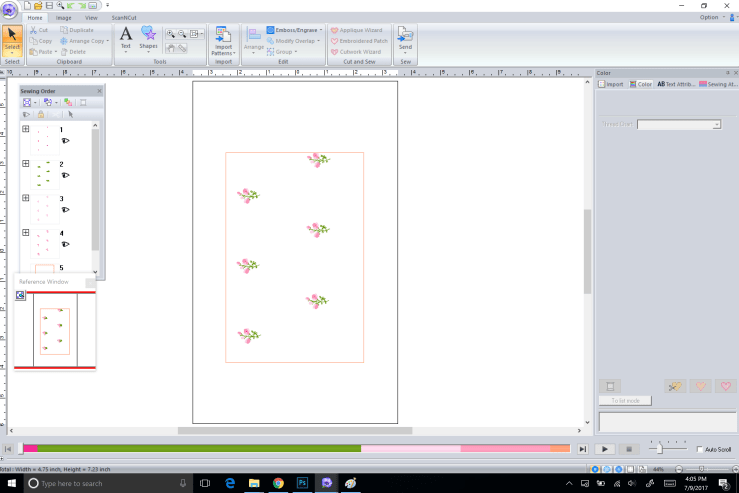
The red lines I would print but remove the stitches after placement of the next grid. They were just there to help line everything up.
I wish I could continue and show how this waistcoat looks finished, but alas, it’s still in the works.
For now, I’ll stop here.


Sewn by: Me (Stine)
Embroidery Design by: Cabbit Corner Embroidery
Fabric: Silk Duchesse from Mood, Linen lining from WM Booth Draper
Other Materials: Silk Thread by Tire Threads #50 from Superior Threads
Pattern: Recollections of JP Ryan for the shirt, breeches, waistcoat and (mostly) the coat.
Photography: Me (Stine)
Time Spent: ~450 hours
Two years back, I dragged my husband to Costume College. After seeing some amazing costumes there, my husband coyly suggested that I make him a frock coat. I LOVED the idea. Sadly, I had no desire to embroider an entire frock coat, and I refused to do anything less than the full embroidery. A year later, I bought myself a Brother VE2200 embroidery machine (with a very generous 12″x7″ bed) and got to work. My original plans were to simply get a jacobean-esque embroidery piece and kind of curve it to a coat line and hope for the best. This is where Cari of Cabbit Corner Embroidery stepped in.
Being an amazing digital artist and a professional fashion designer, she suggested that I find a pattern that I like, and have her convert it into an embroidery design. She even offered to go ahead and curve it to the actual coat pattern.
So I went ahead and scanned in the coat patterns, found the perfect design from cooper hewitt website, I sent it to her. It took 3 months for her to go about and convert it. I can’t imagine it was easy for her, but she did it. AND HOW.
After a lot of trial and error, where we worked closely to make sure that the design was both printable, and accurate (if you look, you’ll notice that even the angle of the embroidery is accurate to the original!), I went ahead and printed some pieces in some rayon thread lying around the house. After an initial trial, I realized the design had to be about 60% larger. I did not have the heart to ask Cari to redo the placement of the design- an endeavor that took her nearly 20 hours the first time around.
I taught myself to use PE Design 10, and edited it myself. I used lines to break up the design but to also help myself align the design on the silk perfectly and reprinted the front panel. This worked much better.
The final design was printed on black silk duchesse, using Tire Silk Threads, in 34 repeated designs. It took nearly 350 hours of printing, each repeat requiring 35 color changes. The pieces were then sewn by hand together, using whip stitching and blind stitching to line and sew it.
I cannot recommend the patterns I used enough:
JP Ryan’s Frock Coat http://www.jpryan.com/frock.htm
JP Ryan’s Waistcoat http://www.jpryan.com/waistcoa.htm
JP Ryans Breeches http://www.jpryan.com/details/breeches.htm
Of note, my husband being 6’3″ and very wide shouldered, I ended up editing the coat pattern considerably. I also changed the center back vent considerably to more closely match the vent in the museum piece I based it off of. The final pattern was nearly unrecognizable from the original. That being said, the coat pattern was edited, but still instrumental in making the final coat. Lesson: Always make a muslin. Or five. 🙂
Another tip: If you’re going to scan in a pattern piece and use it in PE Design 10 to bend and place a design, put in a ruler. Both horizontal and vertical.
I am Stine.
I’m a 31yo F, transplanted from NYC to Saint Louis. I absolutely love the fashion, originality, and self expression of New York, but I love the passion and the indulgence of hobbies I found in Saint Louis.
The lower cost of living has led to an abundance of hobbies in Saint Louis that I can’t say I’ve encountered in any other city. There are gamers, robotics specialists, costume specialists, dancers, singers. I mean, people buy freaking warehouses and turn THEM INTO MUSEUMS here! (City Museum. Seriously, look it up.) It’s incredible, inspiring and absolutely lovely.
I’ve also indulged in my hobbies here – fostering lovely but homeless dogs, sewing 18th century costumes, playing tabletop games (both 40k and board games), designing and sewing screen/miniature/imagination-accurate costumes, and who knows what else. I love learning and collecting new skills, and I hope to share everything here.
After all, hand over heart, I believe that the point of life is to maximize your skill points and find an awesome team to play and travel with.
Keep on arting.
Hearts,
Stine
