 Believe it or not, this is actually my fourth attempt to make this dress.
The very first 18th century dress I ever attempted to sew was in college, when I tried to make myself the Sleepy Hollow Dress. What I’m showing you now is truly embarrassing.


AHHHHH! I did absolutely no reading about 18th century clothing before I sewed this dress and it shows. No corset. The front is actually held together by Velcro. I used super heavy upholstery cloth. I didn’t even make a muslin and the waist was about an inch and a half too high.
I got so frustrated with the top that I ended up turning the gown portion into a bolero and an overskirt that I would wear to steampunk fairs. I confess, I did like how it looked for that use.
THAT was my very sad and pathetic first attempt.
But we all have to start somewhere right?

The second attempt was four years ago. I used a really cool polyester fabric that had white satin stripes with black velvet ones. Cool fabric that I attempted to make movie accurate. It actually turned out pretty cute and was used in some awesome photoshoots by Carol Lara, who is an amazing photographer with a very modern goth, fantasy point of view. If you want super modern shots, she’s your gal and she made this gown shine to perfection.


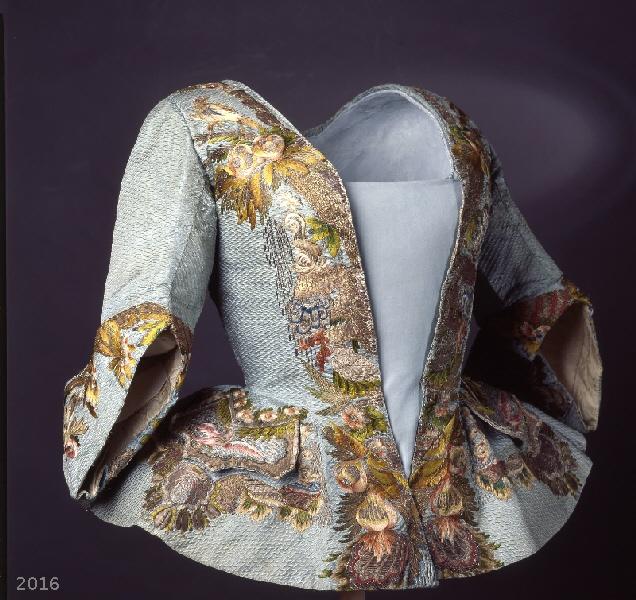
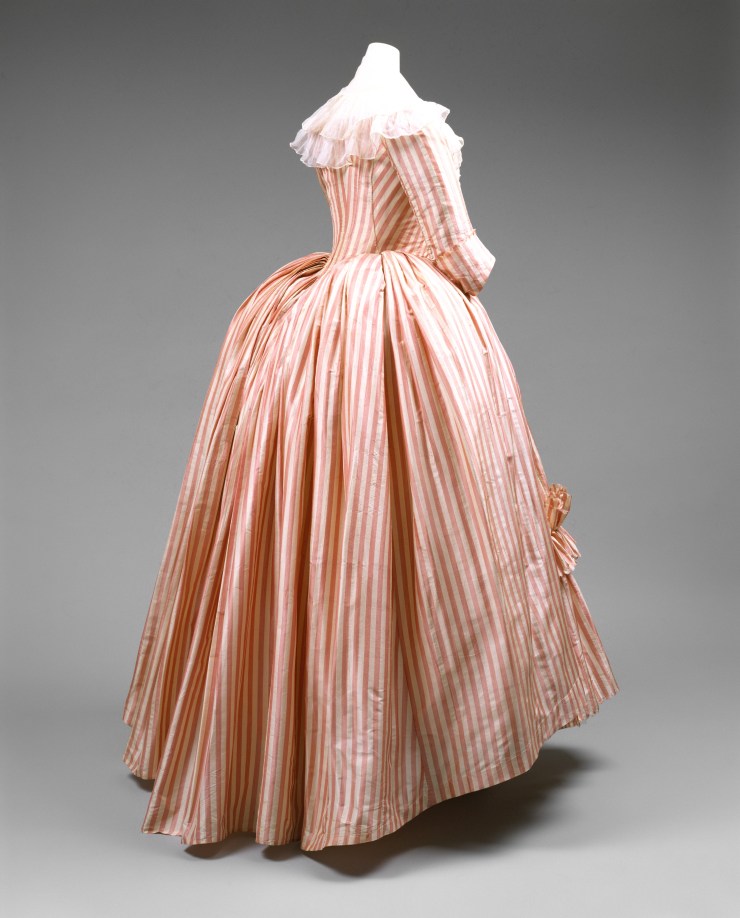
The interesting thing is that while I was in love with the Sleepy Hollow black and white striped dress, I was also absolutely mad about the 1780’s gown in the Met, labeled as an “robe a la anglaise”. For the life of me, I have no idea how much I agree with that description because it’s so much more than that. The anglaise portion is a remnant of it’s previous life as a francaise, then remade in a time when Italian gowns (separate tops and skirts sewn together) were so much more popular. And that shows in the construction as well. (Again, not a historian. Let me know if I’m totally wrong here.)
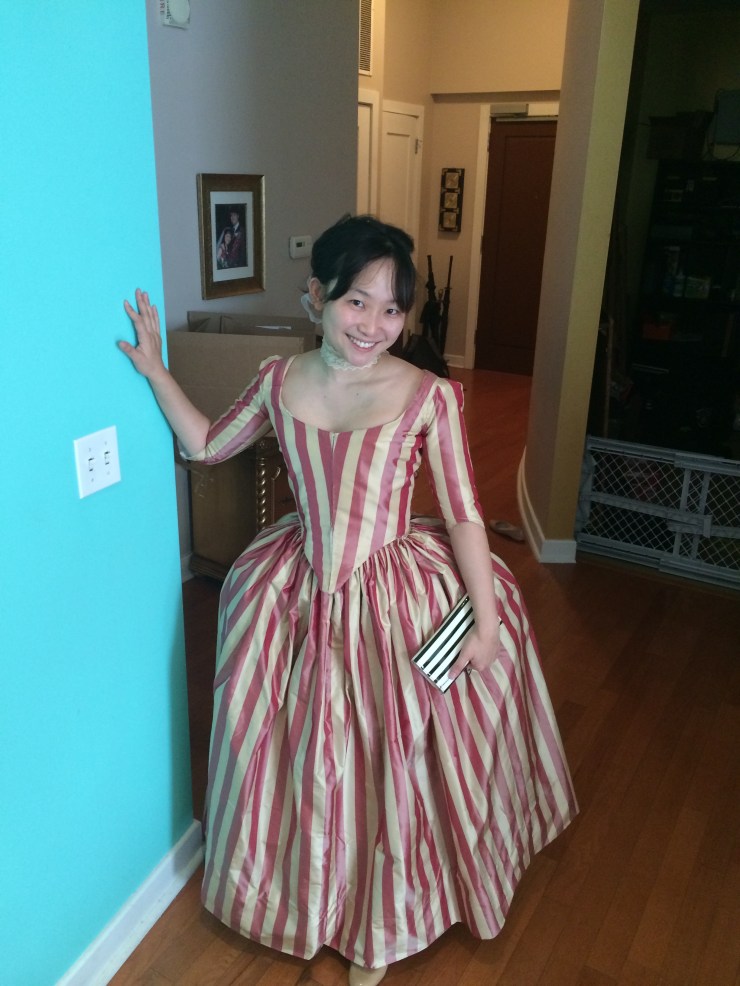
However, I hated zone fronts so I remade the dress as an Italian gown. This was done in my second year in residency, and I called it my “Bo Peep” dress. You can see me wearing it here.
This year, I decided to combine both of these loves into one dress – the Met/Sleepy Hollow dress or my “HA” Sleepy Hollow dress. (Again, not truly HA since I use machines for linings and longer seams, and I’m at the point in my life where I will admit I will NEVER not do that. I work 80 hours a week and I refuse to spend time doing something by hand JUST so I can say I did it by hand. Especially when a machine will do it just as invisibly and better. That’s not to say I don’t respect all of you who do – I just don’t enjoy it so I don’t want to spend my time doing it.)
I think ALL of us are perpetually looking for that perfect black and white striped fabric. I had these goals in my head:
- JET black. Not a dark grey. Not a charcoal. Can’t look light or white in the light.
- Ivory, not white.
- ½” to 1” stripes
- 100% silk.
- Under $50/yard
- Must have 10 yards
The one that I found was a beautiful beige/gold silk taffeta, 44” wide, with ½” black stripes printed onto it. The stripes weren’t woven, but the print was pretty firmly on, so I didn’t mind too much. The price was quite reasonable (less than half of what I had expected to spend). They only had about 9 yards but I decided this was good enough and I got all I could.
Being 4 months pregnant at the time, I decided to postpone this dress til after the pregnancy so I could get it to fit a more normal Stine-figure.
The original goal was to just remake the Sleepy Hollow dress as in the show, complete with non HA trim and lots of shirred chiffon fabric trim. However, then the Met did their “Visitor to Versailles” exhibit while I was 5 months pregnant. I was in NYC for a wedding so I didn’t get to go- not really – but I did manage to pop in for ten minutes… and there it was! THE anglaise that I had so wanted to reproduce in my youth! I took a picture with it, but then had to run out.

I didn’t have a chance to take the notes and closeups I wanted and reached out in the wide vastness of the web. I had some amazing people send me photos and notes! I want to give a GIANT shout out and thank you to Lauren of American Duchess who figured out that each stripe was 3/8″ of an inch and sat around COUNTING the stripes so that she could figure out how full the skirt was. I wish I could share her notes and photos but feel uncomfortable publishing someone else’s work. All I can say is… it was amazing. Meanwhile Paul Malcolm, a facebook friend sent me some amazing high resolution photos of the dress from an all angles. This ALSO helped immensely.
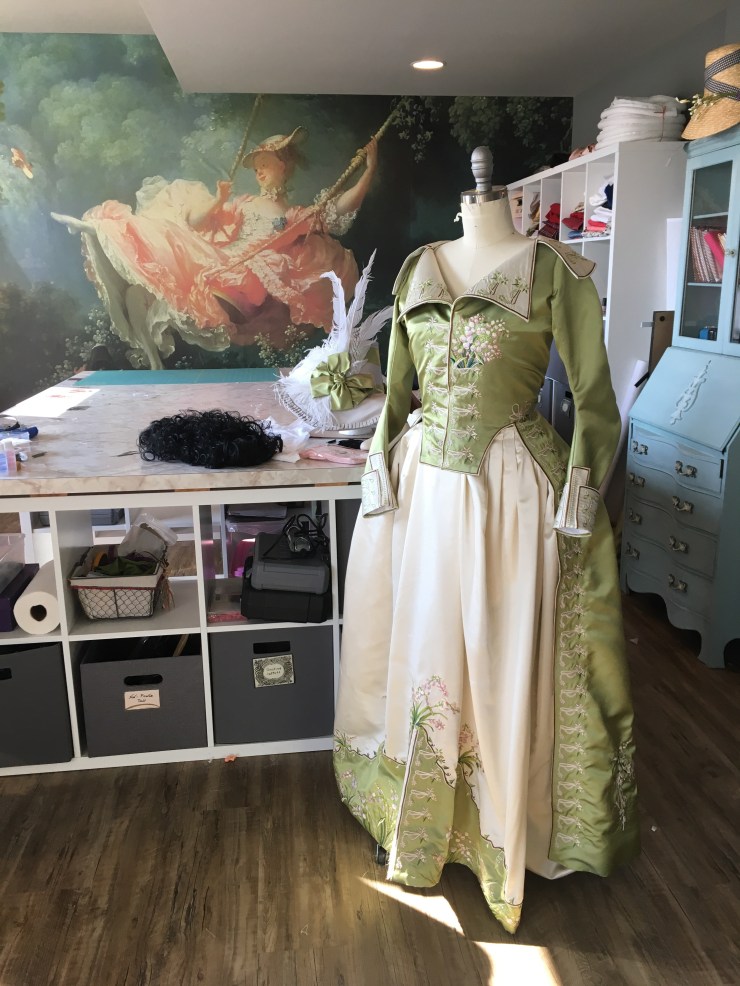
And so… the idea for the Sleepy Hollow meets Met Anglaise gown was born. Why NOT make the gown in black and white stripe? Why NOT make it utterly ridiculously Tim Burton? If I hated it, I could always remake it in pink and white stripe later. (Aaaand I love pink so I may still do this.)
I did have to wait a while after pregnancy. It took me about 6 months to go back down to my full pre-pregnancy weight, and on top of that… I had a lot of other stuff I wanted to get to first. What finally made me just sit down and start drafting the pattern was a post on my instagram, where I talked about the first 18th century dress I made.
Seeing that sad creature on my IG made me want to redo it. I spent the next 19 days frantically sewing, in hopes of getting it ready for my photoshoot.
I originally made my pattern via the draping method.


Now, I had no idea this project was a dream project for many. So if you guys want to sew along with me, and use my project as a guide for your own, please do! It would be an honor! To help all of you out, I’m sharing my PDF of my pattern free of charge. You can click below to download it.
Click here to Downloda Pattern Pieces as PDF
FYI: Please note to measure yourself ON TOP of your corset. I used my red threaded 1780’s front lacing synthetic whalebone corset, which has been custom adjusted to my body (somewhere between an XS to a S). With this corset, I have a 31″ bust and a 26″ waist. This pattern is sized to those measurements. I will not be releasing this pattern with any other sizes, and would highly recommend using the drafting method and my lines to make your own if you are different.
Also FYI: This is a PDF. To print, open in whatever pdf viewer, and then go to Print. Click “Poster”, and print at 100% (do not resize), and it should print on your home printer as multiple pages for you to scotch tape together.
Please note that this is a rough guide to sewing this dress. I cite my sources and tell you where to go for the instructions on how to sew this dress – anything further is all up to you.
Sources for instructions:
- So the back of the original Met gown and the Sleepy Hollow gown is sewn “En fourreau”. I used my knowledge of en fourreau gowns from Larkin and Smith English gown pattern.
- The rest of the gown is kind of sewn up like an Italian gown. I used the American Duchess instructions “English gown” for that.
- The pattern does not include sleeve patterns. I used my favorite 18th century sleeve pattern (The JP Ryan Anglaise gown) pattern for the sleeves, but feel free to use your favorite.
In any case, this is how I made mine:
- I made a lining out of cotton coutil. I find twill works just as well for this. While the original was almost certainly lined in linen, I find that linen tends to stretch and distort, so I stopped using linen as a lining. I feel vindicated in this, when I found out that Academy Award winner Gwen Russell also uses cotton duck for lining since it olds up better for wearing and rewearing.
- Once the lining was on, I started cutting out the back pieces. I used the English Gown pattern instructions to sew the back “En fourreau” style.
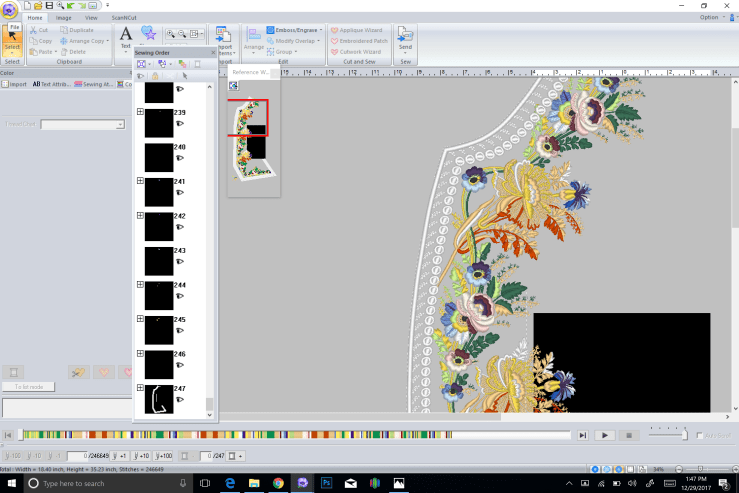
- I used two different needles with two different threads at the same time to make sure I had the right color thread on the right colored stripe. This was not actually done on the original but I enjoyed doing it this way. 🙂
- Now, this may sound weird – but the gown foes from classic anglaise style in the back, to an more of an Italian style gown. (Look at the AD book for the definitions). While pleating up the skirt, I ran into an issue with this. To get around this, I cut a vertical slit, around 4″ long from the top, and folded the gown under the edge of the bodice, and then pleated the rest of the skirt a la the “Italian Gown” instructions in the American Duchess book. If this sounds confusing, don’t worry about it- pleat it however it looks pretty and makes you happy. I have no idea if what I did was HA.
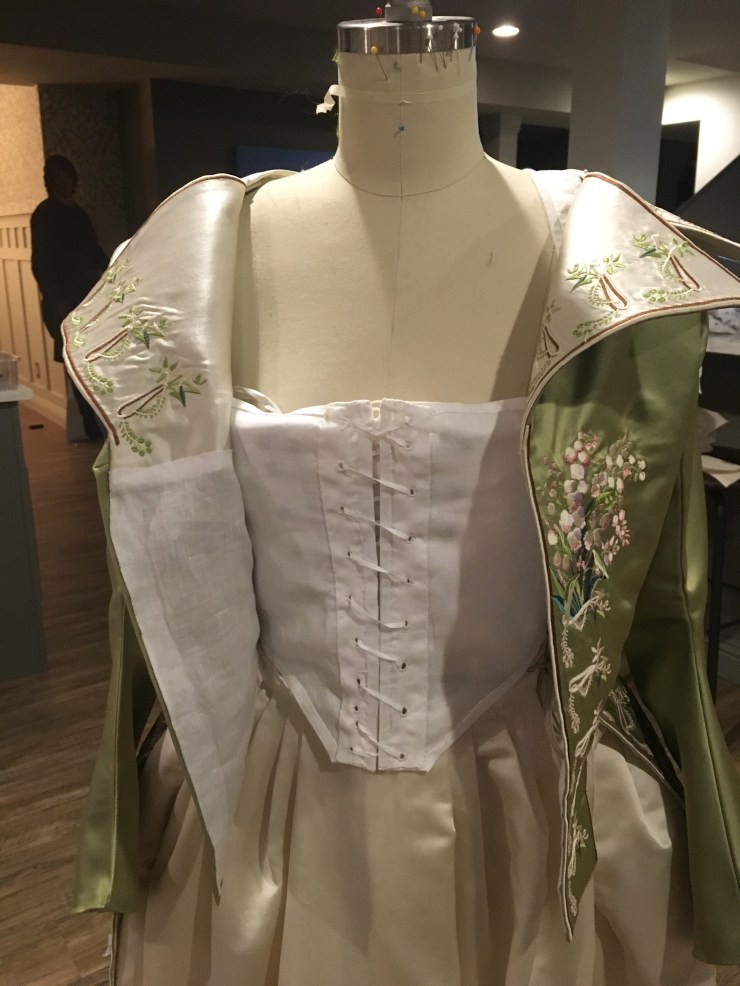
- I did line the “flippy flappies” in the front of the gown in linen so that it would act a little more free and less thiff than it would have in the coutil.
- The front of the gown is sewn to the sides of the “zone front”.
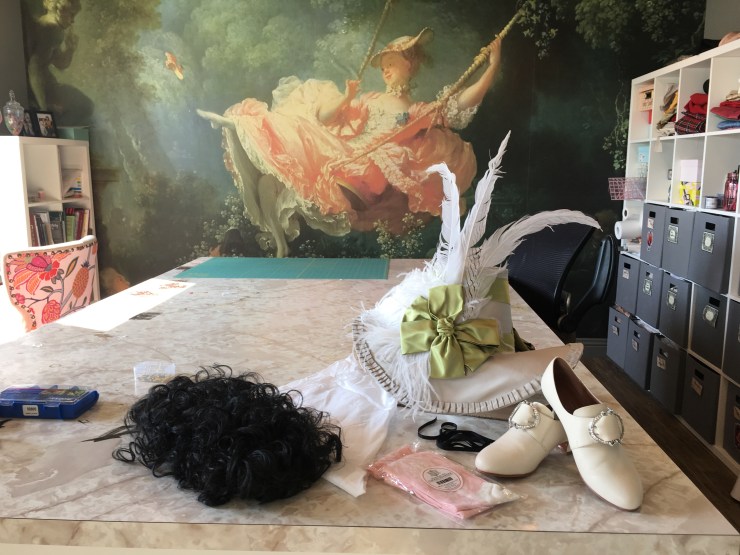
- I used a pinking iron to make the pinks. I finaly found a use for my Monitor magazines! The original pinks were about 3/4″, mine was 1″. I then sewed it on.
- To close the gown in front, I just pin it closed using dress pins.


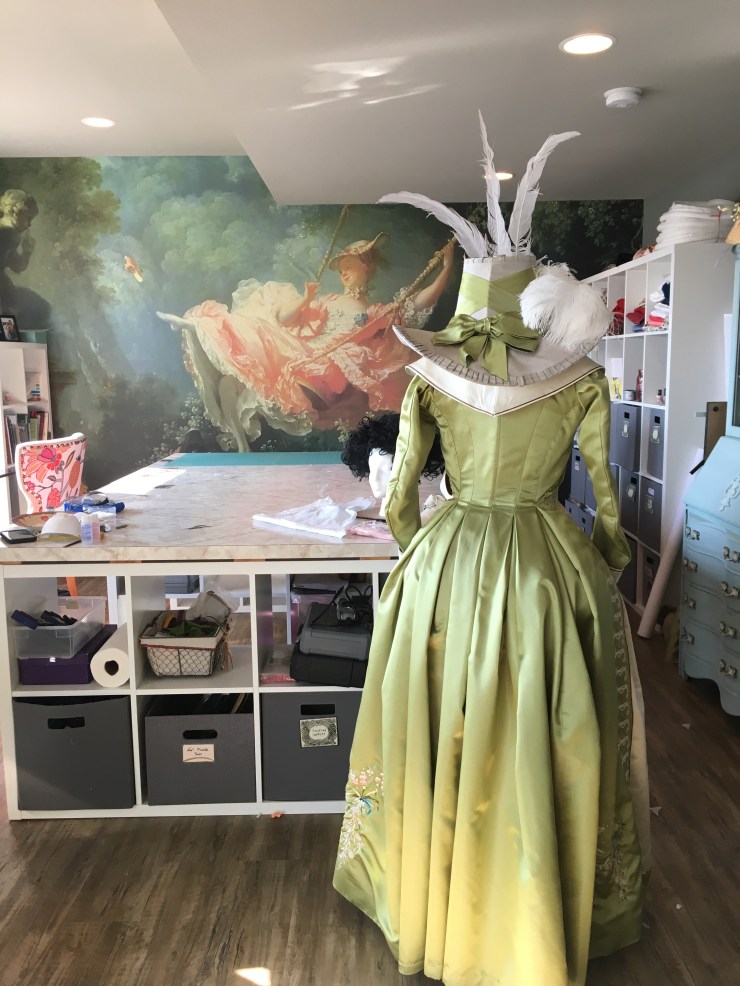
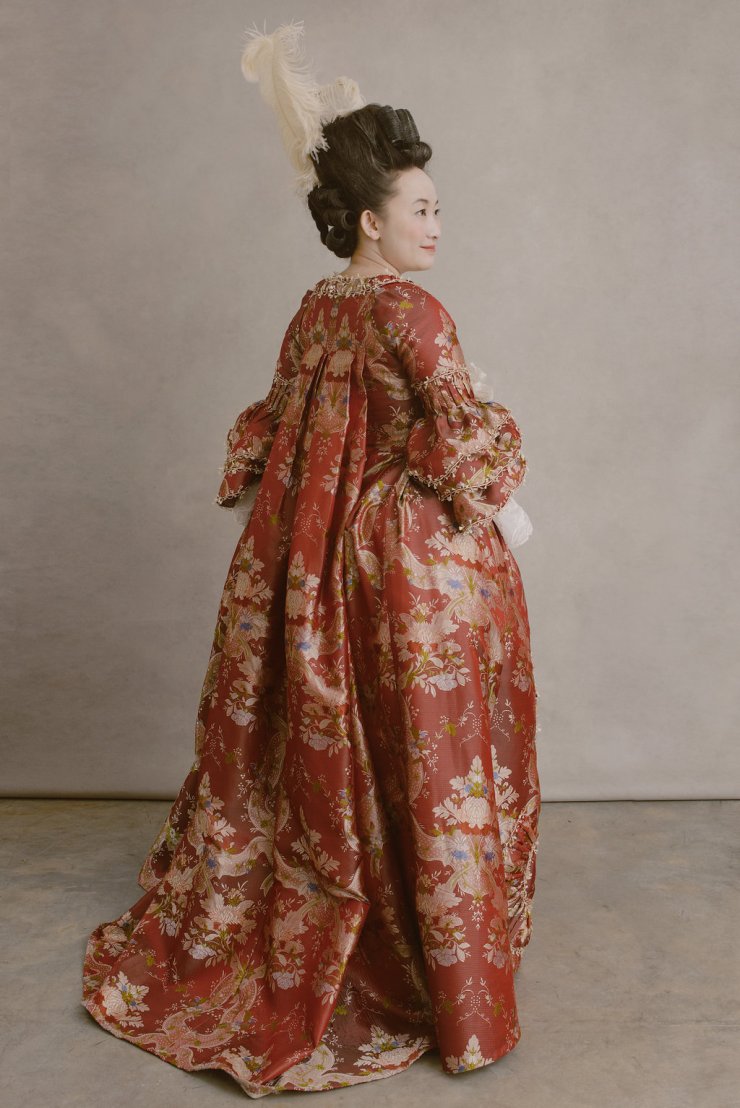
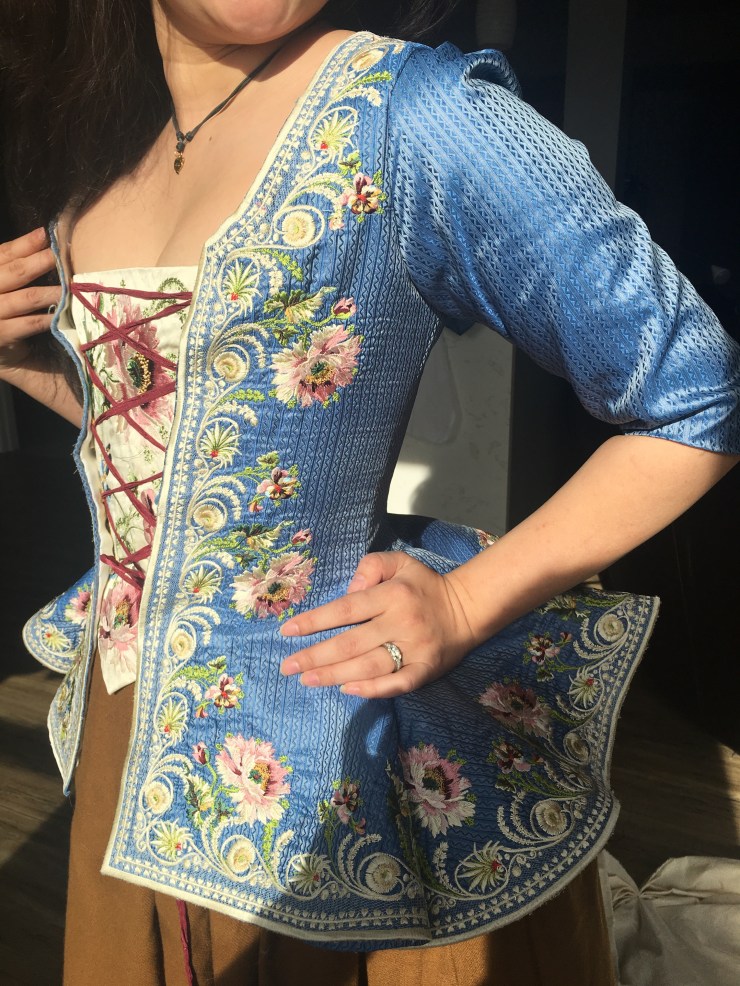
Okies, now that that’s all done, time for fun photos of me wearing the dress!


Photos by Lindsey Hinderer
Makeup by Savannah Summer
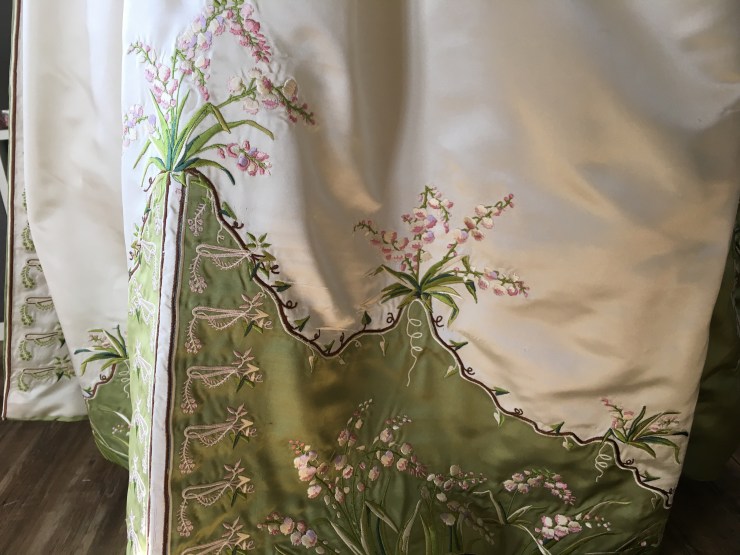
Some detail shots, also by Lindsey:


 I didn’t LOVE that shape, and instead decided to change the shape to a more typical redingote shape (the sloped V in front). (Please don’t hate me!)
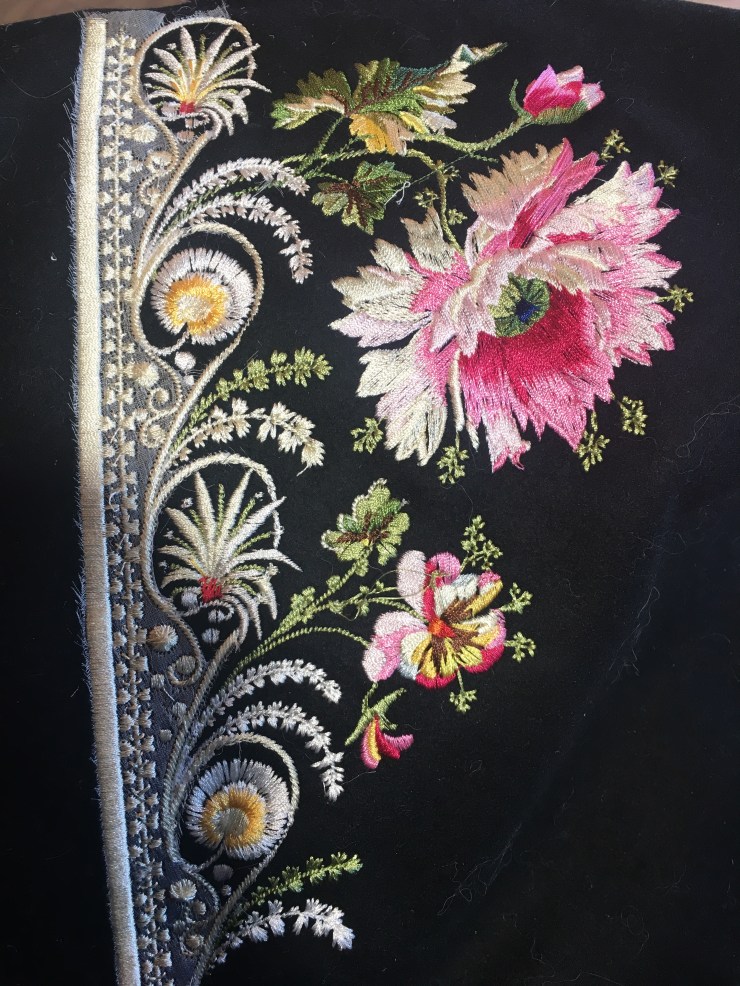
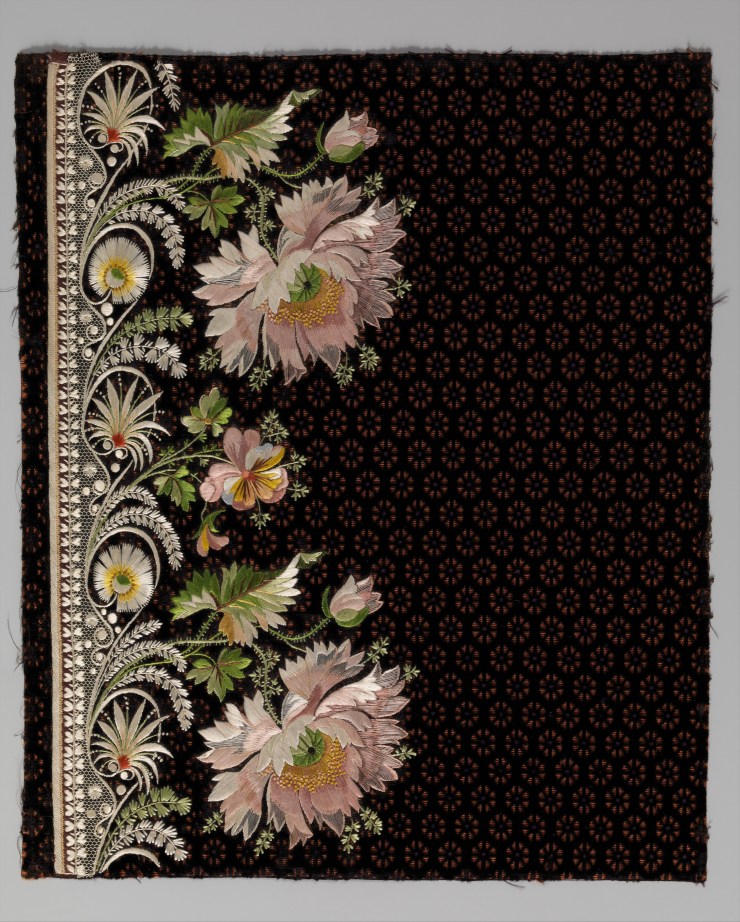
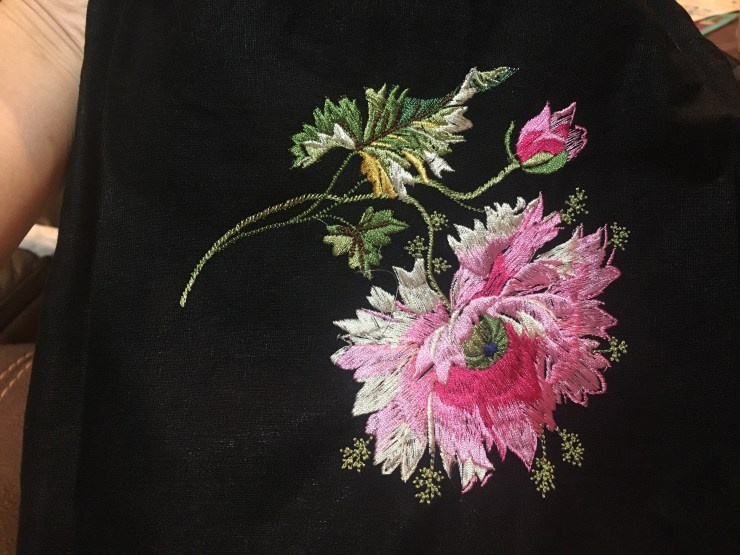
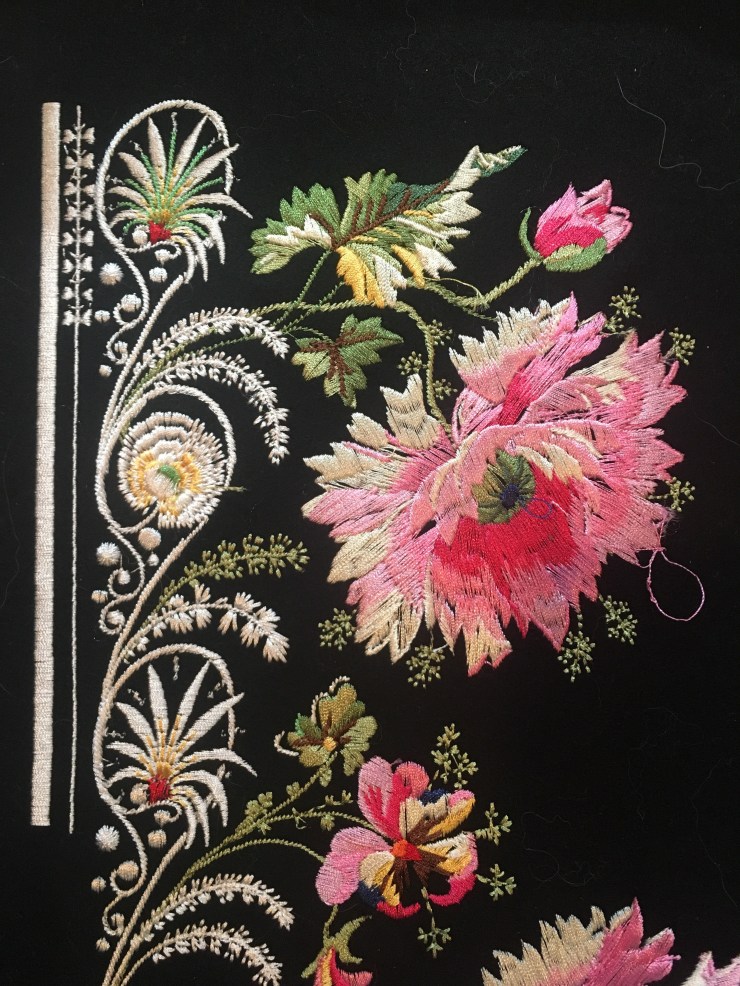
 You can see here how the original has incredible tambour (on the right). embroidery The left is an early draft of my version in satin stitch. This particular one is an early draft in polyester thread on some cotton linen scraps lying around the house but you can see how the tambour and the satin stitch are different. At the same time, I also loved my version and chose to continue with the satin stitch.