A few months ago, I ran into an article about a frock coat and suit (complete 3 piece set!) at the Mueum of Victoria and Albert. I fell HARD for it.
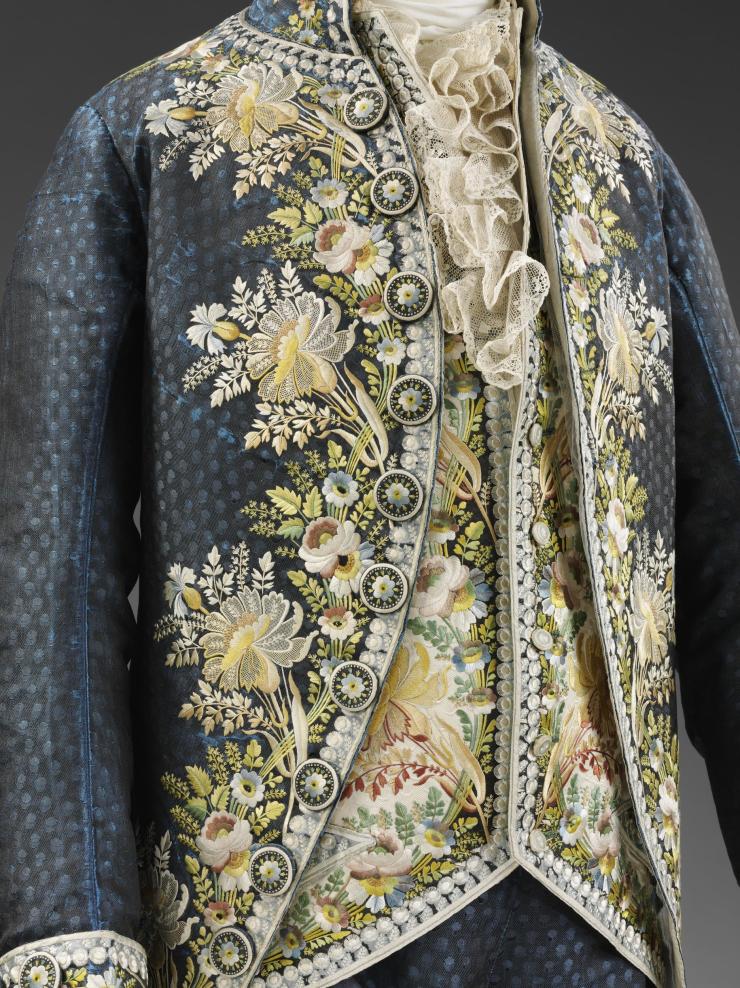
You can see pictures of it at two places for the most part – the actual Museum site, and fans who go and take pictures of it. The museum site has the best resolution, but the fans pick up the details. Like a mysterious pocket on the right pocket. Like the details on the back. I myself plan on doing a sojourn to London this coming May/June to see this in person.
But for now, I wish to recreate it for my husband to wear to the Versailles ball. Because let’s face it – it’s GORGEOUS.
So I went to work digitizing. I could go into the details of how, but I’m not particularly good at digitizing myself, nor am I an efficient one. However, my artistic better half, Cari from Cabbit Corner was busy with a combination of life and a GIANT stack of commissions, so I decided to tackle it myself.
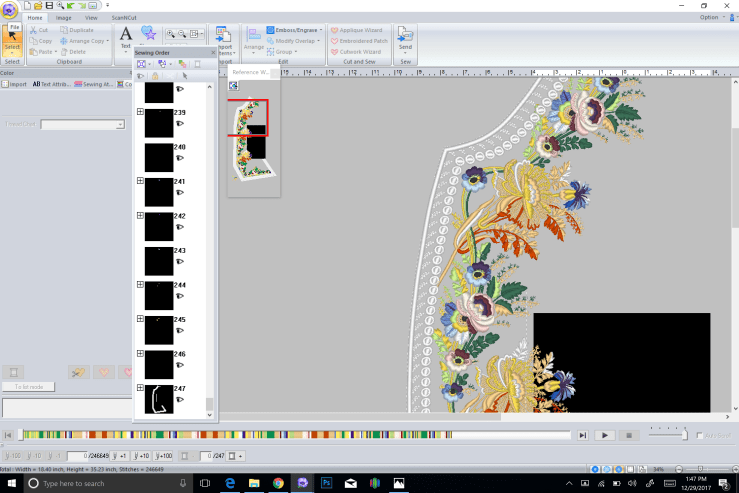
As you can see, there are a LOT of different parts to this design. I actually made myself a to-digitize list and broke it down into separate parts depending on how long I thought each part would take. I put it in an Erin Condren book to be pretty.
About 30 hours later, I had a first draft. (On a side note, because I get asked this all the time, the program I use is PE Design 10. The program gives you AMAZING power over your digitizations but it is VERY slow. Not sure if this is my computer or the program, but it’s slow.). This is the reason I don’t digitize for commissions. I don’t think it would be fair for me to charge anything less than 25 dollars an hour to sit and slave away on a design, and yet I know there are people who do it way faster and way better than I do. Which is why if asked, I will always send you to one of them: Denise of Romantic Recollections, Cari of Cabbit Corner, and Liuba of ArtEmbroidery.


You can see my design on the left and this interposed on top of the coat on the right. I then started to put it into a coat setting to see how it would look.
I printed this design about 8 times (6 hours each time) before I found a color scheme I liked. You can see some of the failed prints here:


After I finally decided on a color scheme, the hard part was choosing the back fabric. As you can see from the close up pictures, the fabric is on a gorgeous brocade of dots. For the life of me, I could not find any brocade anywhere like it. And moreover, no one would make it for me for less than 200 a yard. I knew I would need about 10 yards. This resulted in me deciding to go solid. It helped that I realized between ordering two custom historic wigs, custom shoes, and two flights to Paris, I was out of budget.
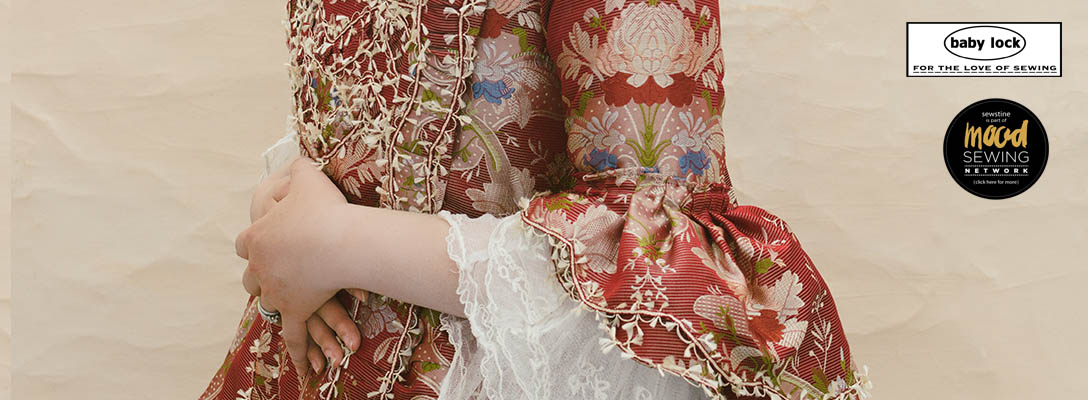
So after all that I was able to finally print the first OFFICIAL piece of my coat – a cuff. I was happy with it. 😀 You’ll of course notice the antique silk organza applique.

On a slightly different note, I am not going into the patterning of this coat and how to do layouts of the embroidery here. I go into it in previous articles here and here.
The patterning of the coat was complex. I used JP Ryan’s 1780s coat pattern but it turned out my husband had a very odd shape so I ended up using that to draft my own version. Her patterns are always excellent and I highly recommend them.
I did also start on a waistcoat since I happened to have the silk duchesse in house. However, after doing a 24 hour shift at the hospital, I messed up placement of the third pattern repeat and the whole thing turned into garbage

So now starts the process of embroidery and more embroidery. I anticipate at 6-8 hours of active machine time per repeat, 45 thread changes PER repeat (I think I mentioned I’m not the best digitizer ever), and about 42 repeats for the whole coat, not counting buttons or belts… we’re looking at 1,890 thread changes, and 336 hours of machine time or 14 days of machine running 24/7 (which obviously I can’t do so it will likely be 42 days embroidering). Good thing I love the process!
Also I made a new rule for myself – I’m not allowed to work on this tired. Granted, I’m currently working 70-80 hours a week so I may end up breaking this rule now and then…
Let’s end this on a positive note – check out this front panel! Wheee!!


