As wonderful as I find HA (Historically Accurate) to be, I don’t know if I have it in me to be completely HA. For one, I like using modern techniques because deep down, I think if 18th century people had access to what we do now (like sewing machines, and the joys of flat lining), I think they would have used it.
Furthermore, I love mixing and matching different eras and my favorite parts from one era, and bits from another era. (Ie: I love the ruffled edging of a 1770s gown, but I prefer the trim of 1750s gowns more.) I hate following the rules too closely. But I digress, what I mean to say here, is that I don’t think it’s necessarily awful to use modern techniques to make 18th century clothing.
In terms of the gorgeous, embroidered frock coats of the 1770s, I love using my embroidery machine, and I don’t think of it as cheating. I certainly don’t have a workshop full of apprentices waiting to embroider my pieces!
In any case, this is how I made the embroidery for my frock coat. By “me”, I do refer to both the incredibly talented Cari at Cabbit Corner Embroidery as well as myself.
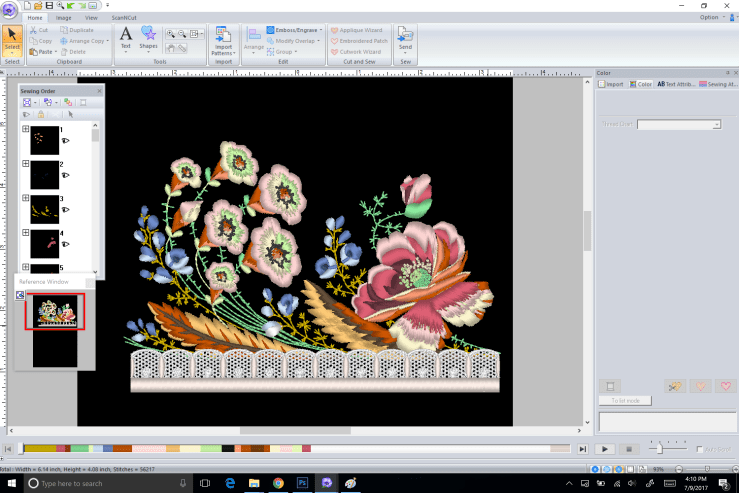
It started last August, when I hired her to convert this embroidery piece from Copper Hewitt (btw, which is technically public domain), into a PES file for my Brother VE2200.


I did ask for the flowers from the one on the left, and the border from the other. (I love that lace border!) I did not realize at the time, that in the 18th century, they would get a piece of netting, sew around it and then trim it afterwards and not embroider the whole darn thing! Cari spent a long time converting that lace into a machine sewable piece. This was rather problematic because it meant that each 1″ of lace had approximately 1500 stitches, but more on that in a later post.
Once she converted the embroidery, it looked like this:
I initially made some practice embroidery with rayon threads on some pieces of fabric lying around the house. Around fifteen attempts later, I had selected the final colors for my embroidery. They were similar to the original, but I selected a very bright hot pink silk thread for the flowers. I’m pretty sure that that color didn’t even exist in the 18th century… but again, I’ve never felt obliged to be completely HA!
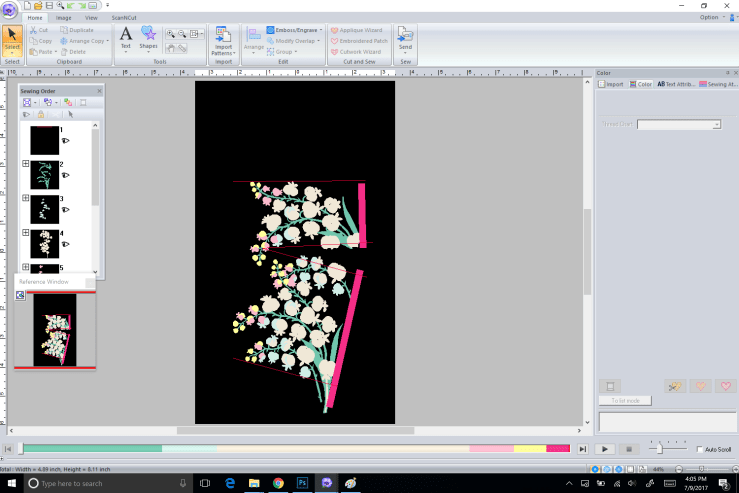
Meanwhile, I had worked out a frock coat pattern that fit my husband about six months earlier. I had started with JP Ryan’s frock coat pattern, but finding that my husband had a very different build from her pattern, I recut the pattern significantly. I scanned the piece in on my 10×14″ flat bed scanner and regrouped the piece on adobe photoshop.
My pattern looked much like this. I highly, highly recommend putting a ruler on your pattern piece before scanning it. It allows you to have a way to scale this pattern piece in whatever software you’re using to add the embroidery. I made a point of putting the seam allowance in black and the actual pattern piece in pink. While I had initially put in lines of how I planned to break up the pattern piece, I came to realize this was unnecessary so please ignore those silly boxes.

To be honest, the first frock coat I made, the placement was done by Cari. While I had made the pattern piece and sent it to her, I feel uncomfortable sharing pictures of her hard work. I understand that she must have spent over 20 hours working on placing the lace and design for the coat. So from here on, I’ll show my own work that I did on placing the designs for my waistcoat. You’ll notice that this waistcoat has horizontal darts since it’s meant for me, a female.

So here is my waistcoat design that I made from pictures from books and draping. You can see that I just scanned in the muslin piece itself. Not the most attractive thing to look at but it did the job. I imported this image into PE Design 10, which it allows you to do, and copy/pasted the embroidery onto it. After about 5 hours of this, I had the design set.
")
")
")
I’m kind of glossing over this part here because figuring out the design and placing it, while important, is a matter of trial, error and artistry. I usually sized the border as 0.22″, and made it a very bright color with pop so I could never forget where it was.
After this was done, I went ahead and broke it into pieces sized for my embroidery frame (12″x7″ for the Brother VE2200. I hear some people have frames as large as 14″x9″- SO jelly!). I highly recommend putting lines on the top and bottom that you can place first to help line up the design perfectly.

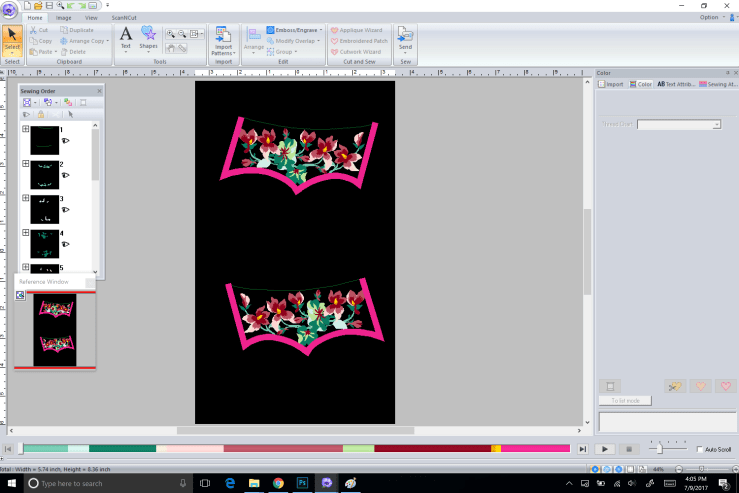
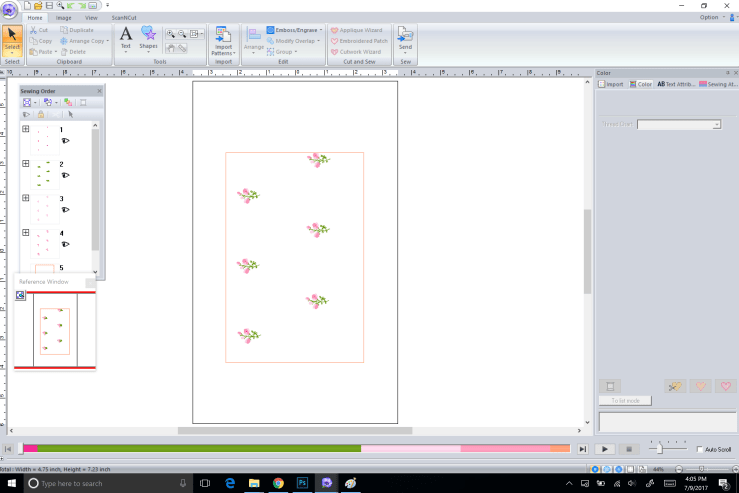
The red lines I would print but remove the stitches after placement of the next grid. They were just there to help line everything up.
I wish I could continue and show how this waistcoat looks finished, but alas, it’s still in the works.
For now, I’ll stop here.

good job!
LikeLike
Impressive!
LikeLike