
I’m not sure if any of you read the Night Circus by Erin Morganstern, but it was quite popular for a time when it first came out in 2010. I have opinions on the ending, but overall, the imagery is gorgeous and made me think at great length about Victorian circus fashion.
In it, the author describes in great detail the black and white outfits that all the characters wear. It has the wonderful, vivid imagery, and even though I’ve loved black and white outfits before it (thank you Tim Burton), there is nothing like a book confirming that your passions are beautiful.
So… with that said, let’s talk about this dress!
A few months back, I found out that the Met Museum has an online portfolio of fashion plates that are free to the public to browse and use. If you want four hours of your life to vanish in a flash, please go take a look and MARVEL at it. 🙂
In particular, I found myself drawn to this one:

The red and white stripes, the bustling, the ruffles on the collar… I loved ALL of it. And I had to make it. It’s honestly kind of wonderful when you find something and you fall in love all at once – it really does take a lot of pain out of the decision making. It looks wonderfully summery and I wanted to make it out of cotton so that I could wear it in the warmer months – currently all my Victorian wear is wool (tartan gown?) so I was looking forward to making something a little lighter.
The best part was, I knew I had the perfect fabric in mind already. I did look a little bit for a red/white stripe, but in particular, I had one I already loved – and I KNEW this gown would be perfect in a black and white stripe as well.

If you look closely at the image, you’ll see that the white has a diamond weave pattern – which I just LOVED. You’ll notice that Victorian fabrics tend not to have straight stripes but stripes with some sort of interest to it, be it a moire weave, some embroidery, or stripes within stripes. If you look at the red stripes on the fashion plate, you’ll notice it has some sort of polka dot WITHIN it. So cool. So I loved the diamond on this, and immediately purchased 12 yards from Mood. PS: They also have this in Navy/White if any of you want to use that too. I don’t have any ideas for it at present, but part of me wonders if it would make the most wonderful seaside gown in Navy!
So after all this, I got the fabric, and I loved it!


The only thing… honestly, perhaps the white was a little too white for my Tim Burton meets Night Circus meets Fashion plate gown? Normally then I might dye it, but with every store for miles being closed, where could I possibly get an ivory dye?
An idea hit me as I was drinking my morning coffee (two double shots of espresso with some milk. In the winter I foam it but now I’m too tired to do even that). I would use tea! I had tons and tons of black tea in the house.
So I ended up making about 5 gallons of tea, putting some water in to dilute it just a bit, putting it in my kid’s bath tub, and letting my fabric soak for about 5 minutes – or until the color looked about right. Honestly, I have NO Idea what the tea/water ratio was. I cut my 12 yards of fabric into 4 yard chunks, and dyed 4 yards at a time, all in the same tea water. Maybe the first batch may have come out darker – but for the life of me, when it was dry, I couldn’t tell – which is what matters anyway.


After it came out of the water, I did rinse it well in cold water, and then tossed it into my dryer to dry. Afterwards, I had some lovely fabric of an ivory and black stripe, with a hint of earl grey scent, which really just made me feel even MORE Victorian. Once this was fully dry, I ironed the fabric, and I realized this had the added benefit that I had now accidentally preshrunk my fabric. Awesome time saver!
Meanwhile, I had to figure out the pattern of my outfit. This was considerably more time consuming. I figured the dress would consist of four parts:
- A jacket
- An underskirt
- An overskirt
- A dickey
I knew I wanted a shawl front suit like jacket. For the jacket, I picked this pattern by Ageless Patterns.
In particular, I chose this one because it had the combination of the correct front (I figured changing this collar to the shawl collar that connected to the back was an easy fix). There was a side basque portion on the bottom part I’d have to remove to make it the shape I wanted, but… overall, easy fixes.
For the Underskirt, I chose to go with the Truly Victorian pattern I ALWAYS use – the1885 Four-Gore Underskirt– since it has a wonderful shape, and I’d used it so many times before. It goes together so easily, has the right shape, and I really do recommend it for anyone who has a
For the Overskirt, I went with this one, also from Ageless Patterns.
So, LOVE this overskirt. If you want JUST the overskirt (I wanted the whole pattern), I highly recommend buying that pattern by itself, which is available also on Ageless Patterns for about half the price.
In any case, let’s talk about drafting the bodice first.
The original bodice for the jacket is for a 38″ bust and 26″ waist. My waist is 25.5″ (on a good day), but my bust is definitely 31-32″. So taking out 6 inches in the bodice was going to be a THING.
So to do this, I started by making the jacket pattern as is from the pattern. If I know I have to extend inches, I usually add a certain amount, but this time, knowing I’d only have to take in, I did not.
Then after cutting the pieces out in muslin, I sewed it together in bright contrast thread. DO NOT IRON YOUR SEAMS.
Then I put on my undergarments, and put it on with the seams facing out (inside out).
I then stood in front of the mirror, and put it on, and pinched in all the areas I would have to take in. Please note that it’s not just horizontally taking it in – I had to take in about 4″ from each shoulder as well. I filmed myself doing this so if you’re interested, please follow my youtube channel… I should be putting up that video in the next few weeks.
Then I changed what I felt needed to be changed, altered the front shawl collar so it would meet the shoulder seam, and then made a version 2.


So you can see this and how it fits there.
In moving the shoulder up, I had to move the armhole downwards, so that was altered a bit.
Afterwards, I had to figure out the back collar.
The original clearly has either a yoke or a sailor collar with pleats. After playing with both, I chose to make it a sailor collar. The yellow version that I’m showing here is the yoke version.


I ended up picking a sailor collar because I decided it would be easier to make the ruffles work with that than the yoke.


So now that I had the jacket pattern decided and finalized (after 3 mockups, I started on the jacket proper out of the fabric.
Usually when I match up so obvious a stripe, I start by cutting out two pieces at a time, sewing them together, and then cutting the next two based on where I want the stripe placement, and then just going two pieces at a time. This is slow going but I tend to like my stripe placement best that way.
I also flat lined all my pieces with cotton poplin. This is from mood but you can probably use cotton poplin from anywhere.


So, if you look at original Worth gowns and Victorian gowns – they didn’t care about a clean and perfect lining. Why should they? The garments wouldn’t touch their skin – and they have corsets and shifts underneath so they didn’t care about the itchiness. I decided I wouldn’t care either so I just flat lined everything and didn’t put a separate lining in.
To make flat lining fast, I usedEncanted Rose Costuming’s idea and serged verything with my Babylock Victory.
Oh man guys… now that I’ve tried industrial serging, I don’t think I’ll ever go back. It’s so FAST. And it threads itself using jet air technology. LOVE!
So after these were all flat lined and serged together, I started sewing it up on my Babylock Soprano.


See what I mean? I just go one pair at a time. First the back seam, and then the two side seams.

Then the two side seams…
Then I started on the front. The front was a little different since I wanted to pad stitch the collar after I sewed it on. So that’s what I did. I sewed everything on, and then I took some time to pad stitch the collars so that they would fall back beautifully. SO much padstitching, but I do love how beautifully it works to make a collar flat and beautiful.


If you’re thinking that looks like a lot of fun to try on, I had to try it on at this point… you know… for science. 😉

For the life of me, I couldn’t decide if I wanted to pleat or ruffle the collar, so I did a sample of both and put in on my instagram. The original image looked pleated but I really did think ruffling looked better. Pleating lost, ruffling won, so I went with ruffles.
Please note that I hand hemmed the edges of the fabric so that there would be no visible stripe running throug the ruffled bits of fabric.
So that was hemmed, ruffled, and then sewn on to the collar.


It was really coming together! I LOVED it.


Once that was in, I machine sewed, hemmed and put the sleeves on.
I had to try it on again of course. To make sure that the sleeves fit. Also because I loved it. I also pad stitched the collar and sewed that on as well.
Now that that was coming together, I started on the underskirt.
For the underskirt, I used the Truly Victorian pattern, unaltered except for the height. For the front three pieces (front center and the two sides), I chose to flat line it in regular tarlatan. This was a recommendation from Costuming Drama and Bernadette Banner and I’m so glad they recommended it! It’s wonderfully light, airy, and cool, as well as cheap! So it gave it that wonderful stiff body for the front, while keeping it nice and stiff. Did I mention it’s 2 dollars a yard!? (as of 5/26/2020).
The back of the skirt, the portion that is ruffled and pelated up, I flat lined in cotton poplin again.


Honestly, if you use a serger for nothing else, please use it to flat line your skirts. My victory must have flat lined all my pieces within ten minutes. It was so wonderful to get that tedious task done so quickly, and serging the tarlatan fixed the “sharp pointy bits” problem that Tarlatan tends to have.
For the darts in the skirt, I just cut out the darts, and hand felled the tarlatan to the dart that was already sewn in the fabric.


Then I added a waistband and the underskirt was done.

You can really see what wonderful body the underskirt has on the dress form already!
Ok. Now time for the difficult part… the overskirt on this was TRICKY.
Step 1. Cut the fabric for the back portion, out per the pattern diagrams. Please note that the fold is along the BOTTOM of the hem – so it’s fold is parallel to the floor.
Step 2. Put the right sides TOGETHER.

Step 3: Sew the pattern together from the marked point 1 to marked point 2.

Step 4. Then pleat the four free sides of the fabric as marked along the pattern.
Step 5. Cut the slit along the bottom of the fold along the left as directed to on the pattern. Then for the back portion, gather the fabric til you get to the slit, and then sew that gather flat, and turn it back, so that the fabric shows, and you pit in to the center of the waist, as shown below. (RIGHT?! Isn’t this nuts?!)


Step 6: Then pull the right side inside out and drape upwards.


Step 7: Play with things til it’s pretty. I suggest looking at the original diagram a lot.


Do I love it? Yes. Is it nutty and took several hours of my life just to figure out the directions? Yes.
So… please note that I didn’t line the back of the overskirt with anything, but I did choose to line the front of the overskirt with cotton poplin.
Then I sewed these together.
Meanwhile, my jacket needed to be completed.
I ended up boning the back, side back, the side, and the front dart with synthetic whalebone that I machine sewed to the bodice. I hand hemmed all edges, sewing the turned over edges of the bottom to the flat lining only. And then I closed up the closures with bar clips from Joanns.
I added a vintage rayon bow to the front as well as sashes to the sides.
Meanwhile, I made a dickey from the pattern included with the bodice pattern.


So to do the dickey, I iron on some interfacing to some cotton, then cut it out. I covered it in some fabric that I hand pleated to make it attractive to me, and then hand felled the edges. Then I did the same for the neck piece and added some button holes. I’m afraid at this point, I meant to take photos and totally forgot.
Please note that for ALL hems – underskirt, overskirts front/back, etc, I chose to hand hem everything so that there would be no machine stitching over the different colored stripes.
But really, at this point, it was done!


So I did do a video of me getting dressed in this outfit, since there is are finnicky portions to getting dressed in Victorian. There are also some shots of me walking and dancing about with this if you want to see how the dress moves.
if you’re at all interested, you can watch it here.
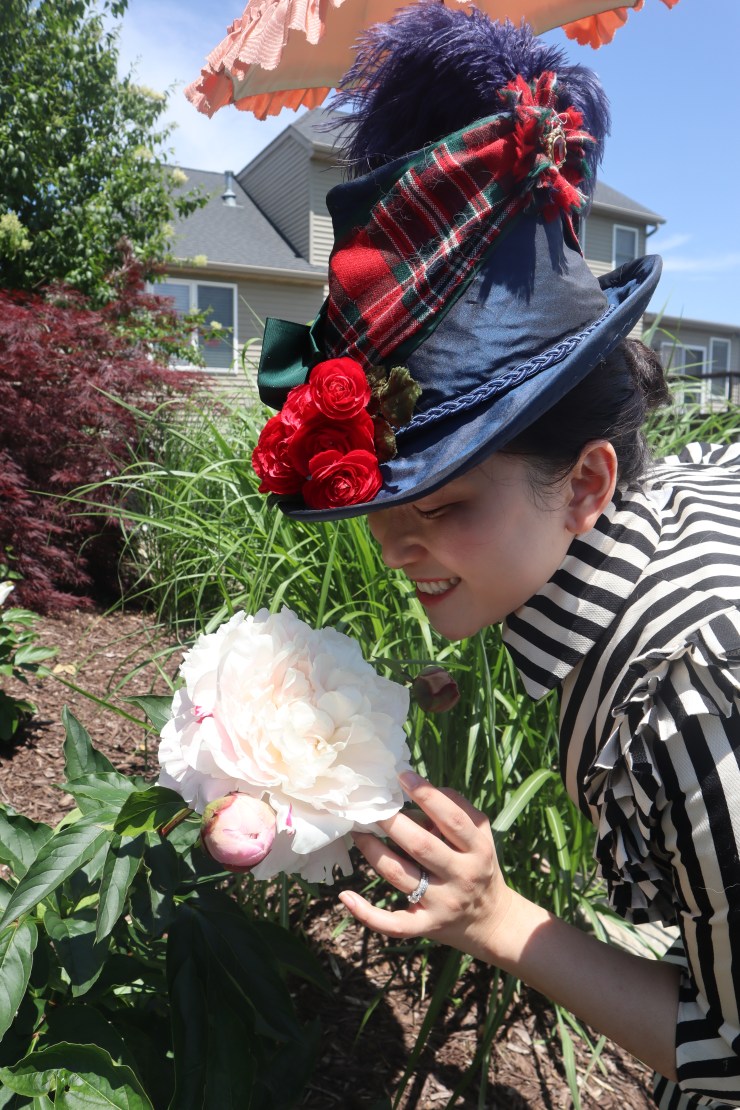
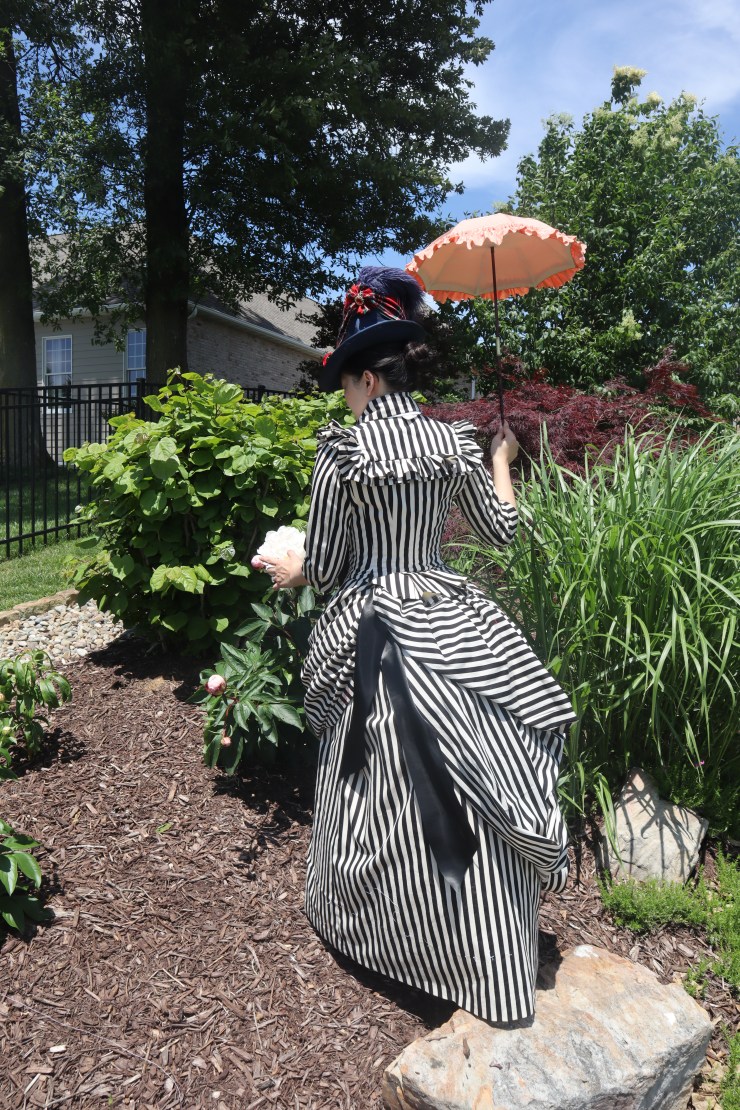
Meanwhile, here are some more photos of it in action:


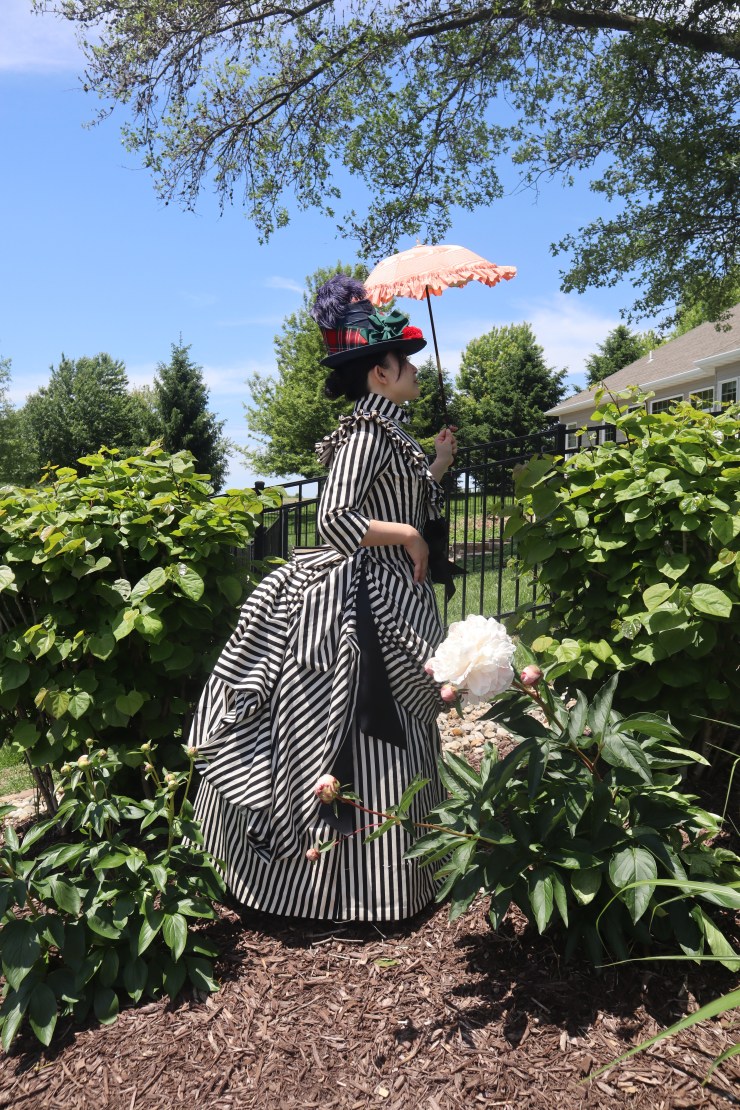
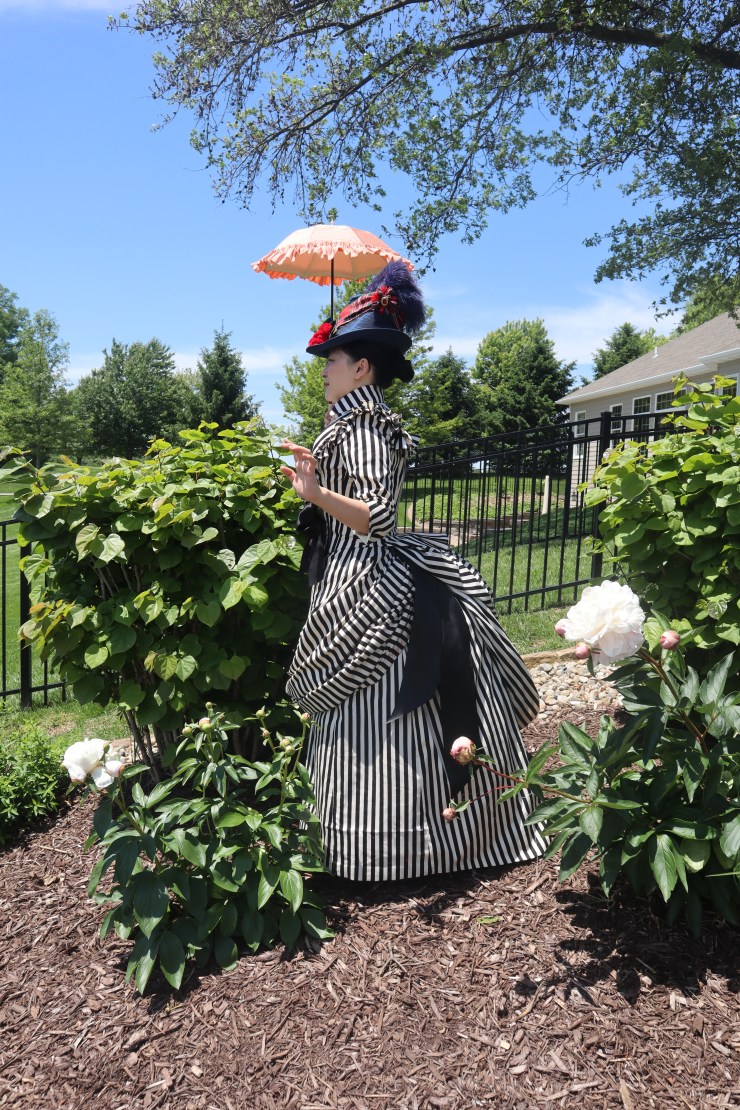
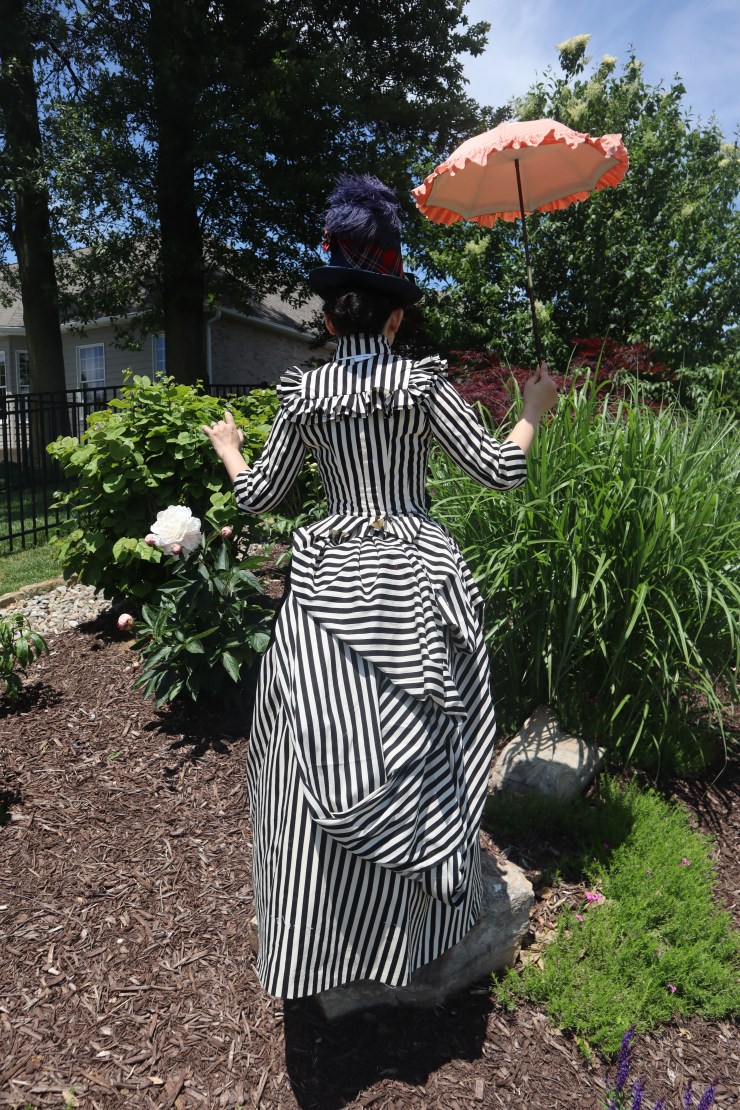
In any case, thank you all so much for joining me on my striped dress of dreams journey! This was a fun one!

Thank You so much for sharing your wonderful sewing project. The dress is gorgeous and well done. You are so talented. Love the parasol with the dress, So Victorian
.
Marilyn and Marion
LikeLike
Thank you so much!!
LikeLike
Beautiful dress, congratulations on your success. I love the stripes and black ribbons
LikeLike
Wow. I love what you’ve done especially the creative touches you exacted in this gown. All flows so well. You are obviously very talented. I would love to have a gown made for me like this…
LikeLike
Thanks for the post and video. It’s like a little breath of CoCo (Costume College). I LOVE the dress.
You’ve inspired me to get up to my sewing room and finish off my teens dress.
LikeLike
Thanks for the post and video. It’s sort of a mini Costume College.
You have inspired me to now go up and finish my teens gown.
LikeLike
I am no sewer but talent in any form is true art. I don’t know how I found this corner of the interwebs but I am so happy I did. Thank you for sharing I am in complete awe of your creativity and craftsmanship. The video is especially mesmerizing. I just had no idea the intricacies involved in getting dressed as a Vic era lady.
Congrats on a job well
LikeLike
Wow!! You’ve done a wonderful job both creating your dress (you are so talented and skilled!) as well as all the time you took to document this for us.
Thanks so much and keep up the great work! All good wishes from Atlanta, GA!
LikeLike
[…] Black and White striped gown, but there were also differences. I highly recommend also reading thatblog postif you’re interested in this era.So I’ll […]
LikeLike
LOVE!!! Everything about it – black and white stripes, the bow the hat the parasol, the beautiful fit… You are amazing!
LikeLike
That’s so, so pretty! You’ve just stepped out of the fashion plate.
LikeLike
I absolutely loved this book but I think I love your dress even more! It’s gorgeous. The black and white fabric is right up my street and I admire your courage in tackling something this complicated. Hope you get plenty of occasions to enjoy the dress!
LikeLike