I think the absolute dream I have is to one day embroider on silk mesh in such a way that I can make my own 18th century lace. Honestly, with my first two machines, such a thing was not possible. The silk netting was too weak and the tension was too high that I got a ton of tears and heart break.
Luckily, my next machine was much better. The tension could be lowered to a significant degree and I was able to embroider on even very delicate silk netting. I now use a a Baby Lock Venture, and I’m finding that with significant play, making lace is feasible.
Suggestions:
- When making lace, use 2-3 layers of dissolvable interfacing. I use Baby Lock dissolvable, which is fairly thicker than most that I get on amazon, so I’m able to get away with only two layers. If I am using another brand, I tend to use 3 layers to make up for the thinness.
- Lower the top thread tension as much as humanly possible.
- Increase your bobbin pressure. Not a ton, but just enough to make sure none of it will show on the out side.
- Most importantly: LOWER your speed! I find that when I’m making lace it’s best to go at the lowest possible speed. I usually use 400 stitches/min which is the lowest on my Venture.
Materials:
I use silk netting – but completely honestly, finding real silk netting for less than 120/yard is very difficult. I used to have a source but last I checked, they were completely out of real silk netting. I would recommend polyester netting if you can’t find silk; it still generally embroiders well. DO avoid nylon netting at all costs – it’s weak and can’t handle all the buse you’ll be doing to it.
Thread: I use fairly lightweight Kimono Silk thread at 100wt. Works beautifully, comes in many colors, 10/10. Will totally recommend.
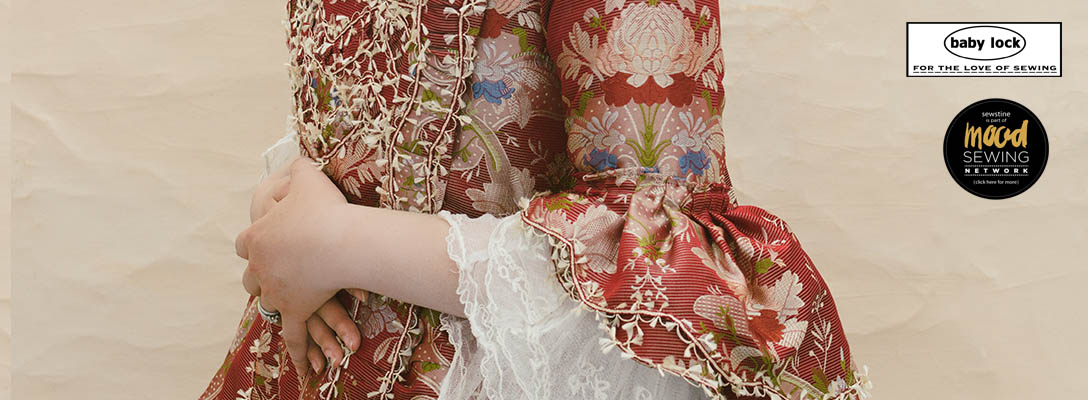
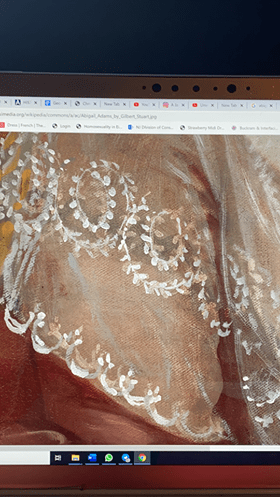
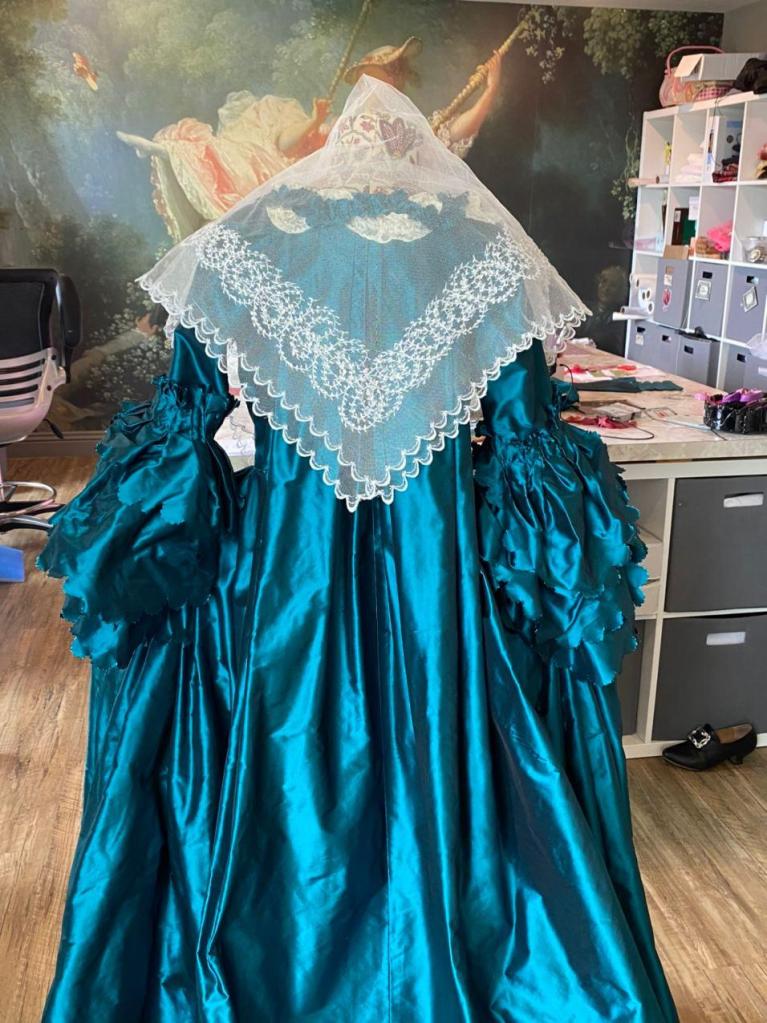
Now, let’s talk about Abigail Adam’s Fichu. I worked closely with Sara of Founding Mother on Instagram, who is a LEGIT actress who portrays Abigail Adams and a brilliant costumer to boot, to work on this. I had been thinking of digitizing this for a while, based on the painting by Gilbert Stuart.

So from the painting, Sarah was able to deduce that the fichu is likely two layers, due to it being a square that is folded in half, diagonally. I’m inclined to agree wtih her, since from the painting, you can see the shadow of the second layer underneath it.
Now, one reason I was PARTICULARLY keen to digitize this is becaues a little portion of the ACTUAL FICHU EXISTS!!! A collector actually has a TIIINY piece of the fichu that survives, which, if actually the real one (and it looks accurate to me), shows it to have been silk embroidery on silk netting. I don’t feel comfortable sharing someone else’s licensed images, so I’ll just link his page here.
So… after Sarah and I decided to go with silk netting, I started digitizing the design.

I initially started with the scallop border on my software, Palette 11 by Baby Lock. I used a stem stitch for the swags and a satin stitch for the actual scallops. I ended up switching to a fill stitch for the scallops (120 stitches/inch) and keeping with the stem stitch (0.04″ wide) for the swags.
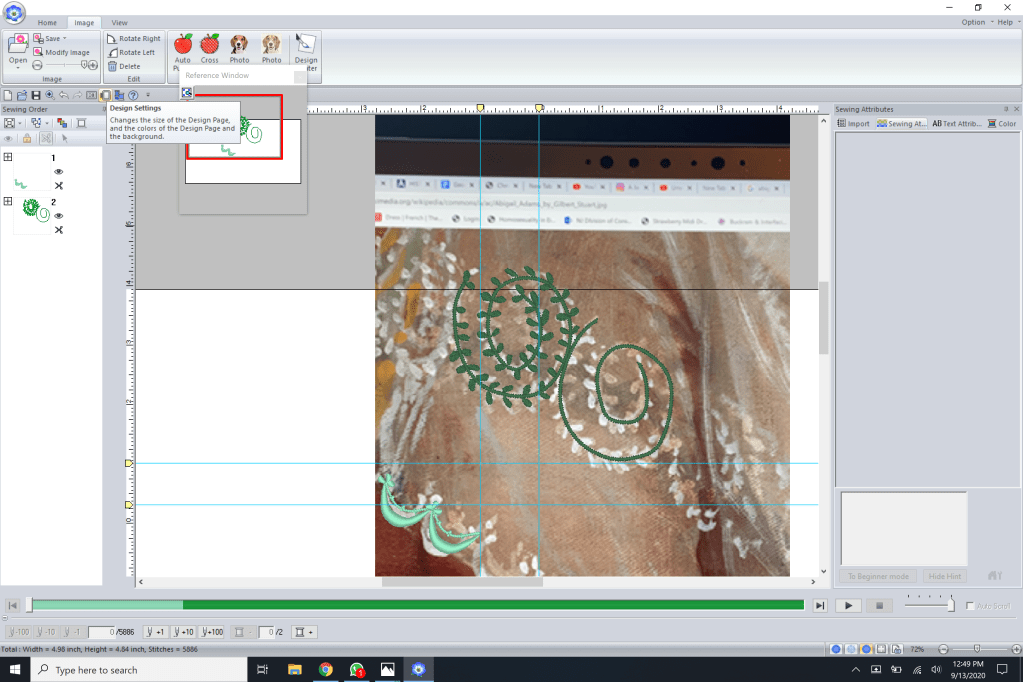
I then used the closeup of the portrait to zoom in and put the swirls close together. I ended up making 3 distinctly different swirls, and rotating them out in the actual final fichu. Having more then one that you switch out occasionally does a good job of making the embroidery look more handmade.
Sarah was able to tell me that she wanted the scallops to be about 7/8″ wide, so I used this as a guide to keep everything else in proportion.
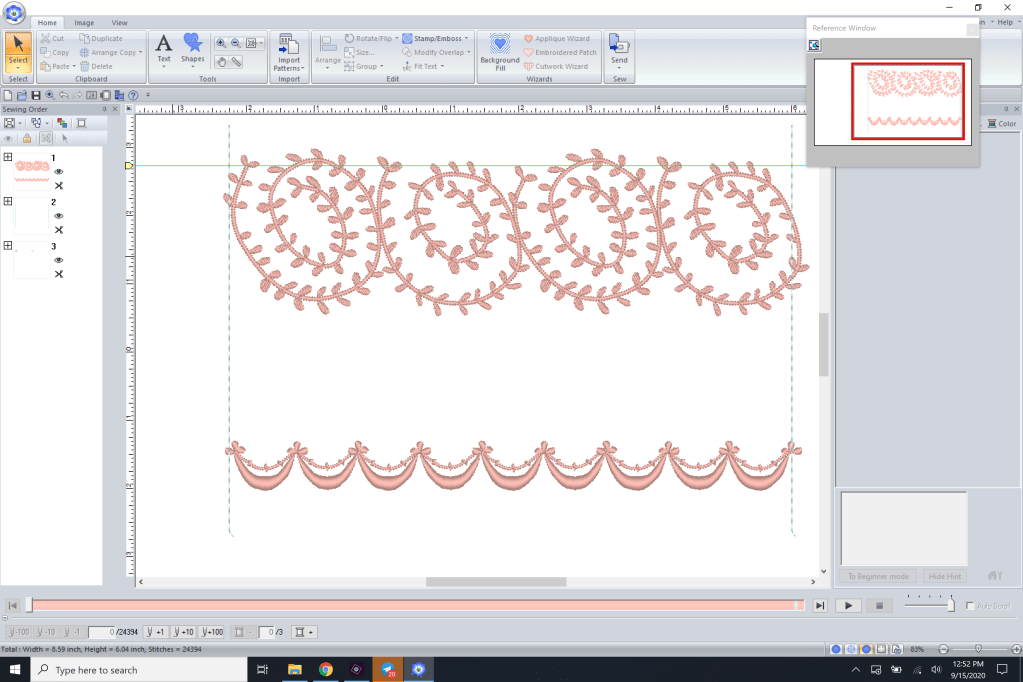
And I was able to come up wih a repeating design that we were both happy with. Again, you’ll notice that each swirl and each swag is not exactly the same; this is intentional and actually much harder than justy copy/pasting a lot. But I feel this is so important when doing 18th century reproductions – so that it has a chance of looking hand made.
Now, I turned this into a square design.

We decided to make the final fichu 34″x34″.
Of note, square designs like this are a PAIN IN THE BUTT to embroider. The problem is that when you’re trying to embroider, especially something as malleable as silk net, it will shrink and pull. The problem with a square design is that when you have to end up EXACTLY where you started, things can get messy. I let Sarah know that there would be some “wonkiness” at the starting point, and I got started.
First, I broke up the design into 11 pieces so it would fit my machine.

You’ll notice that this looks just like the last design but I put lines where I planned to break up the design, and you’ll notice a 1, 2, and a 3, to show how I’m going counter clockwise (I’m chaotic good). With the design and plan ok’d by my client, Sarah, I got everything ready.
Then I started to embroider.

So of course, I started with the first panel. You’ll notice there are lines that help place the next part.
So I just started going at it! I initially planned on doing this 1 part every two days, do it over three weeks, since this particularly embroidery netting requires me to SIT next to the machine (in case it gets stuck so I can emergency stop it, since it tears SO easily). However, I got myself hooked and I did it in a week.
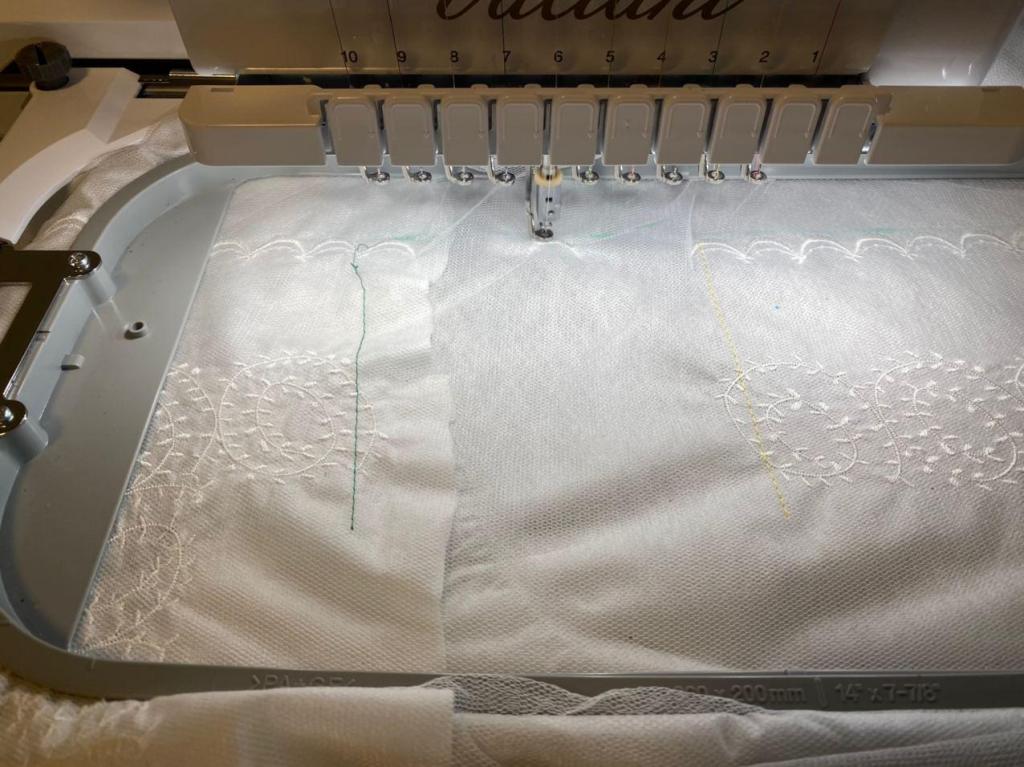
This is me lining up the last piece. As expected ad warned, there was a little bit of “wonkiness” right at the end to make it all line up properly.

But…. Let’s be real. Can you even see the wonkiness?
I then cut away the excess dissolvable interfacing and removed the marking stitches (do this BEFORE you was for the first time is my suggestion).
I then wahed it in warm water to get rid of the dissolvable interfacing.
And then I let it dry.
Then with a tiny pair of embroidery scissors and infinite patience, I sloooowwwwly cut away the outside netting and it left me with this.

Now, I’m pointing out the wonkiness here for Sarah’s sake… but can YOU see it?
How about now?
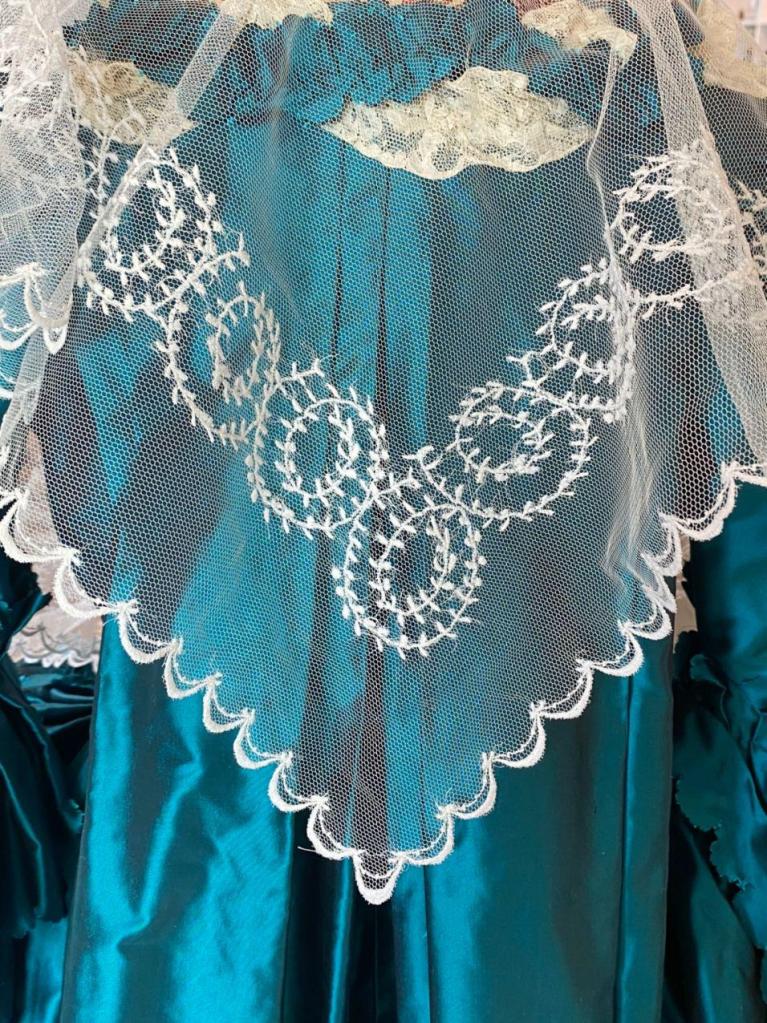
How about now?
So I’m pointing all this out to let all of you perfectionists know… It’s ok for things not to be perfect. I have studied actual 18th century garments and you can find mistakes everywhere. It’s ok! It’s human! It proves it’s man made. You’ll notice I intentionally put in “imperfections” to make it look more 18th century and hand made rather than machine embroidered.
In any case, Sarah loved it, and she is now working on the actual gown so she can really dress up as the Gilbert portrait! Also, I loved it too so I plan on making myself one too!
So… that’s all I’ve got folks! Happy embroidering!
PS: If you do want to embroider this for yourself, have a 14″x8″ hoop, and don’t want to digitize it yourself, I’m selling the files in my shop here: Sewstine shop

This is incredibly lovely and I think you’re very brave going for a square design on net. I’ve been very impressed with how easy my machine does make it to work on lighter fabrics though I haven’t been quite brave enough to go for net just yet.
LikeLike
Did you use silk thread to embroider with and if so did you have to adjust anything on the machine? Thx..
LikeLike