I confess, I don’t love regency. I’m 5’1″, and what they call a “stick” body shape. I found myself drawn to eras that have an exaggerated waist to hip ratio – I’m talking 1760s giant panniers, 1880’s giant bustles, 1890’s bump pads and tiny waists… and regency was just… also a stick. In fact, the first time I asked my husband what he thought of my regency dress, he said, “Is it supposed to just go… straight down?” I damn near threw something at him.
In any case, these outfits aren’t FOR him. They’re for us who want it! Regency does have something going that a lot of other eras do not. The accessories are PHENOMENAL. I love a wonderful regency bonnet, and due to the lack of giant side hoops, women gave up pockets and started carrying little hand bags called reticules. They wear little neck ruffles under their gowns for modesty called chemisettes. Gloves are a must. Chains, jewelry, decorate them everywhere. Tiny little lace up boots cover their adorable feet. They wear little jackets called spencers that are covered with the most wonderful details.
Spencers. That’s what finally talked me into regency.
These are a few of my favorite spencers from the Metropolitan Museum of Art.


You’ll notice they have decorations that look a lot like soutache. It’s actually called rouleaux, where you make tiny tubes out of bias tape of the same fabric, and then sew them on the fabric, into wonderful designs.
I seriously considered doing that myself to make my own spencer, but after seriously considering it, I realized I don’t have the patience. I do think it’s gorgeous and would direct anyone who wants to do it to this website:
My friend Hannah, FabricnFiction does such a wonderful job explaining everything step by step. She even goes into tricks on how to make it look neater and prettier.
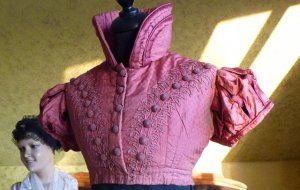
For me, instead of rouleaux, I decided to do a mock soutache out of machine embroidery. To be fair, I see soutache (using a non fabric trim to do the same thing as rouleaux) everywhere in the regency period, such as this lovely pink spencer that was sold by antique-gown.com.
So to get started with machine embroidering a spencer, I had to make the mockup first out of cotton muslin. I used the pattern by black snails, which you can get off heretsy shop. I love that I can print it myself on my printer and just tape it up. I confess, I find it so satisfying when I see the pieces go together so well.
After I made my cotton muslin, I took it off, and used a pencil to draw the design in. After looking at different rouleaux and soutache designs from the period, I picked a design from Godey’s Lady’s Book and Magazine, a periodcal that ran from 1830-1896. Clearly, it’s 20 years too late for the time period I am aiming for (1810), but on the other hand, it’s period “looking” enough, and… I never claimed to be historically accurate anyway, so I ran with it.
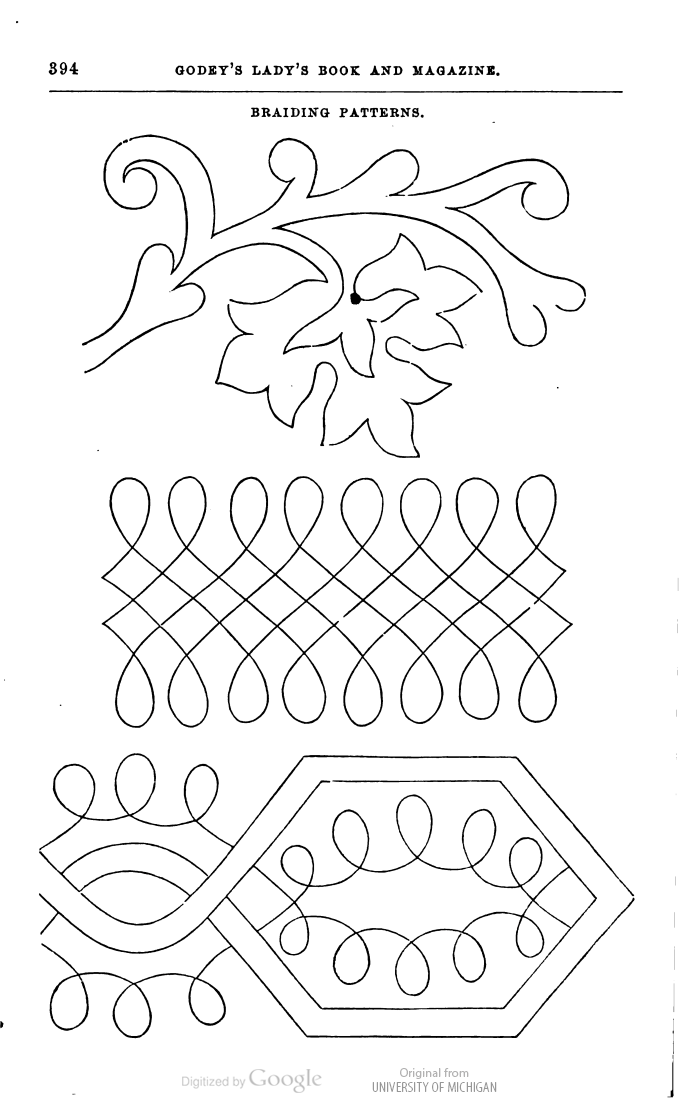
After I drew the image onto the mockup in pencil, I made sure I liked the design. I then cut it up again, penciled in a ruler onto each piece so I knew the scale of the image, and scanned it into my computer.


Then came the digitizing portion. I opened it up in Palette 11, put in the image, and made sure the scale was correct. I used a large running stitch (0.15″ stitches) to pencil in the outline of the seam edge, and then a zig zag stitch using the open curve tool. My stitches were done at a density of 114 stitches/inch, with a zig zag stitch that was 0.12″ wide.

I did a quick practice at this point with some pink remnant silks I had in the house. I stitched it out and realized I loved it. 🙂 Please note it’s important to test it at this point since I was wondering if the 0.12″ for the stitch width would be too wide, or perhaps even too narrow, and moreover, how the design would look in real life. Things always change from the screen to printing, so I thought this was a good time to check. Luckily I loved it so I didn’t have to alter anything.

Now, the front isn’t the only portion of this spencer that will be embroidered – there will be embroidery all over the back, collar and sleeves too… I drew out and digitized all those at this point.


Now that I knew I would love it, I started with the final draft. I had this beautiful mauve silk satin that I got from renaissance fabrics a few months back, so I laid out the fabric and drew out the outline of all the pattern peices.


Now when I draw this out, I prefer to use frixion pen or marker, since the lines mostly vanish when you iron it. Please note “mostly vanish” – you can usually see a thin transparent trace of it, so do be careful. It vanishes mostly enough, but this may not be enough for you personally. Please test before you try it on your favorite fabric. You may have some trouble seeing my line – I ran out of black so I ended up using orange on mauve – enough for me to see it, but it didn’t photograph very well.
After drawing in the outline of the pattern pieces, I wanted to put in the line where I would actually be lining up the design to – since the pattern pieces include seam allowance and I want the design to be at the edge of the piece minus the seam allowances (since if the design went right to the edge, it would be destroyed by the seam allowance, if that makes sense). I drwe that secondary line in dotted line.

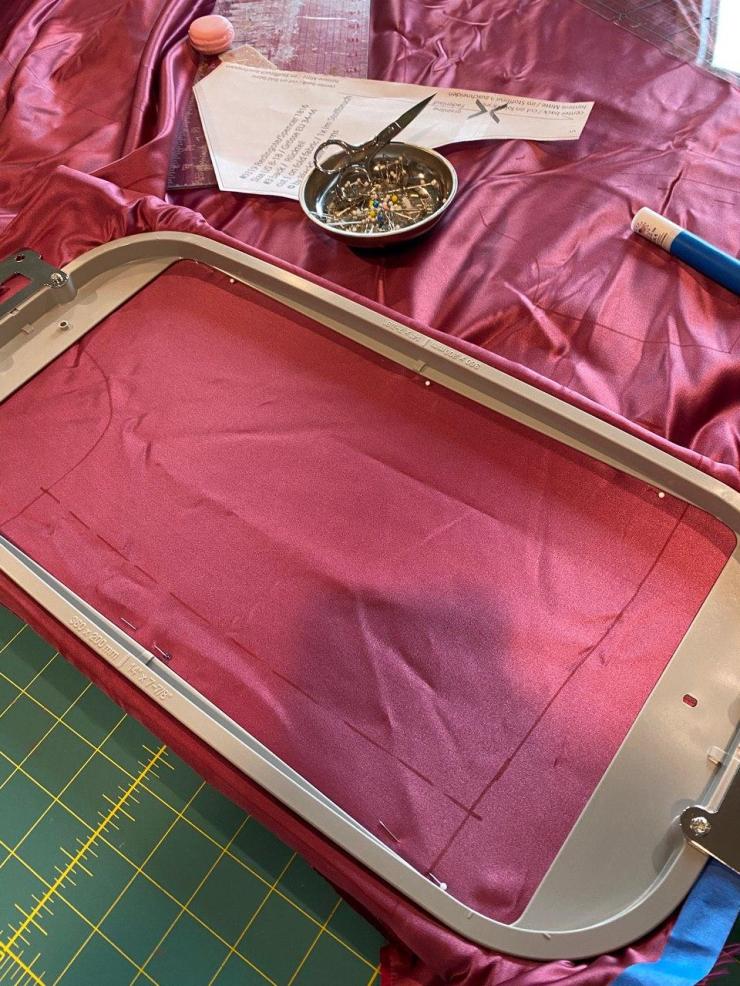
Now for silk historic embroidery on garments, to avoid puckering, I personally use tear away interfacing. Here I’m using Baby Lock brand tear away interfacing. I really recommend it since it is strong enough to handle the embroidery but still tears away without too much strain – (it really is a weird Goldilocks issue. Too weak and it doesn’t actually stabilize your stitches. Too strong and it distorts when you tear it away. Ick!)


So giant tip for ME when I’m embroidering these large scale designs – MAKE SURE YOUR HOOP IS TIGHT. Like taut like a drum. I use a cool nifty screwdriver tool to really tighten my hoop. I recommend this little tool as well. (Please note, I don’t get a commission from sharing these links – I don’t even have an amazon affiliate account because I’m too lazy (for now) – so… please know I don’t have a share in sharing these links or products and would honestly not recommend them if I thought they were bad.)

After tightening the hoop as much as possible, I then actually pull the edges of the fabric around the edge of the hoop and pin them with little extra fine glass head pins to hold the design in place and minimize shrinkage. This may be overkill but I find it helps a lot with my designs.
I then put the hoop into my embroidery machine (I use a Baby Lock Valiant) and use the scan tool so I can place my design in visually.


For the thread, I use a silk thread by Tire Silk Threads, a Japanese company. I’m afraid there are no silk thread companies in the US. Japan still has it because they actually use silk threads for their kimonos, but the US really doesn’t. ![]() It’s a pity but it’s understandable. In any case, their threads are gorgeous, and I try to find a thread that is as close as possible to the fabric color so it mimicks the soutache and rouleaux effect of using similar colors or the exact same fabric.
It’s a pity but it’s understandable. In any case, their threads are gorgeous, and I try to find a thread that is as close as possible to the fabric color so it mimicks the soutache and rouleaux effect of using similar colors or the exact same fabric.
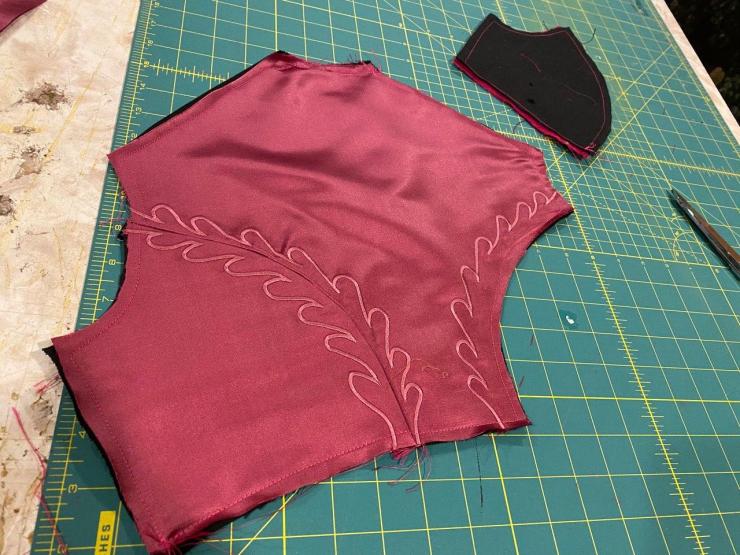
I stitch out the front.


Then I do the same for the back portions.


This design really doesn’t take too long to stitch out – I would say the front panels are about 40 minutes, and the back panels are about 10 minutes a pop. With the collar pieces, the side pieces and the sleeve pieces, we’re looking at approximately 3 hours total, including prep time for the embroidery – which is NOT bad at all.
After all is embroidered, I sit on the couch and tear away the interfacing- generally, the rule is take out as much as you can. I don’t fuss with every little bit but I do try to tear off as much I can comfortably.


After all that, it’s time to start putting it together. I cut the fabric out using the lines I had drawn out (the copied pattern pieces that included the seam allowances). Since the fabric is fairly flimsy and has a tendency to roll (like all silk satins), I flat lined them to some nice strong cotton twill. Note that I used black because that’s what I had in the house.


You’ll notice for the front panel, I only flat lined the front to where I would want the buttons to go. If I flat lined it all the way to the front edge, it would be four layers of fabric where the button holes would go and would just be too thick and annoying for me to sew through.


After flat lining, I used the instructions in the pattern to stitch together the bodice. It was so satisfying to see the design come together in the back!
I then sewed the bottom edge of the design to the bottom.


It was time to start the sleeves.
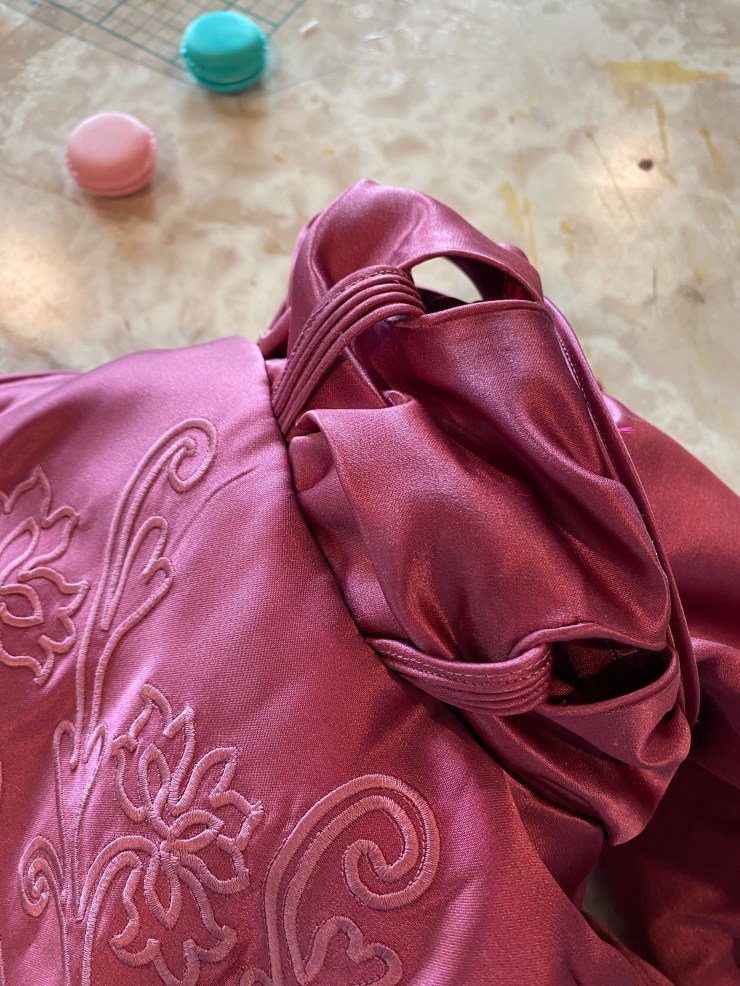
So… I wanted to add little puffed sleeves to mine. It’s hard to describe so I’ll show a spoiler of how it looked at the end here:


So to start, I made about 12 yards of bias tape 1.5″ wide. Then I used some 2mm gimp I had in the house (but any 2mm cord should do in all honesty), and just made a ton of cording. 12 yards of cording to be exact.


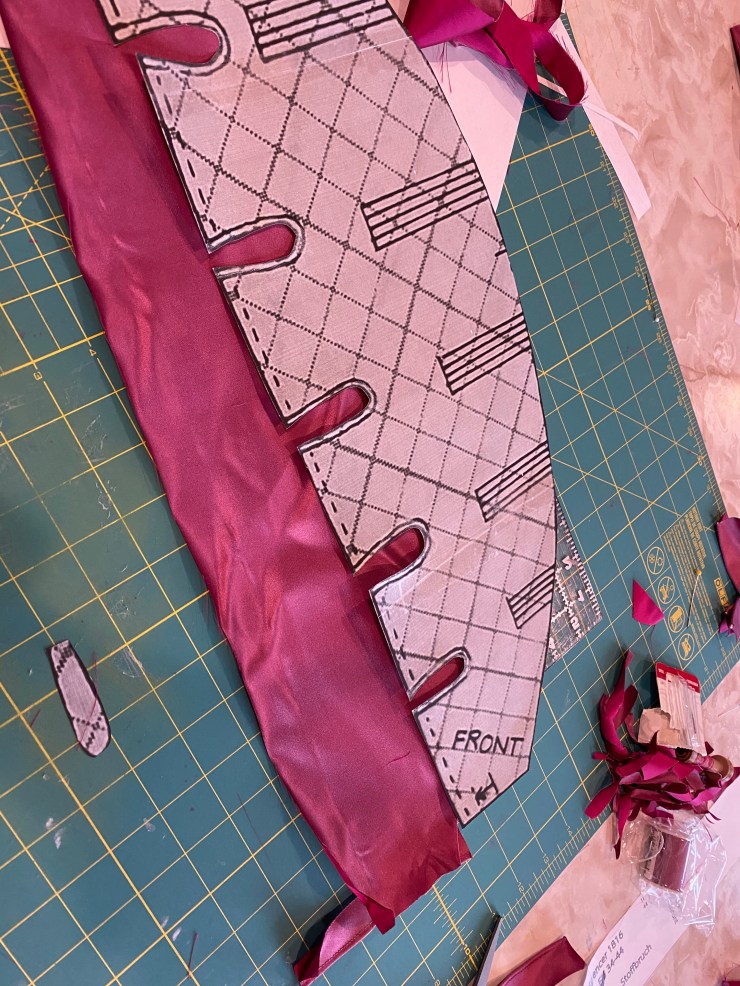
Meanwhile, I got the pattern piece from my book, Janet Arnold’s Patterns of Fashion 1 – and scanned it into my computer. I enlarged it digitally on my computer, and printed it out. I don’t feel comfortable sharing this pattern piece since it’s copyrighted to Janet Arnold but I’ll leave the book link up here. Seriously, if you love this time period and you only own one book, I recommend this one.
After printing out my pattern piece for the sleeve, taping it together (since it was on 3 sheets), and cutting it out, I cut it out of my fashion fabric. Please note that in mine, I forgot to add a seam allowance. To salvage this situation, I used a scant 1/4″ seam allowance on all sides. Don’t be me. Add a seam allowance.
I copied the looped areas, and then used my cording that I had already made to cord the areas as seen there. Then I cut the center, ironed it, and used hem tape (3/8″ by Heat and Bond) on the wrong side to sew that down. I’m sure this is historically inaccurate, but it was fast and it gave a nice appearance. Morever, this will NEVER be washed in a machine, so hem tape would be strong enough.


For the loops, I sewed together 4 pieces of cording together, cut the excess fabric off, and hem taped the edge clean. I made 10 pieces of cording – 4x 4″, 4x 5″, and 2x 6″ for the 10 different loops. Since there are 5 loops in each sleeve, the longest (6″) was for the middle, the 5″ for the two flanking the middle, and the shortest (4″) for the two at the ends. I looped everything at this point and machine sewed them together.


Afterwards, I pinched the two ends together and zig zag stitched them on my machine (I get asked this a lot so I’ll just let you know what I use now: Baby Lock Soprano).


Afterwards, I sewed the two ends of the sleeve together. You’ll notice that the two don’t fit together perfectly since the back is longer. This is normal. You’re supposed to put a pleat in somewhere to make the two about the same. For the band along the bottom, I used two cordings sewn together for a double cording. I gathered up the sleeve to fit the band, and then I sewed it with the two right sides together, then flipped it, ironed it, and used self bias tape to clean up the edges.
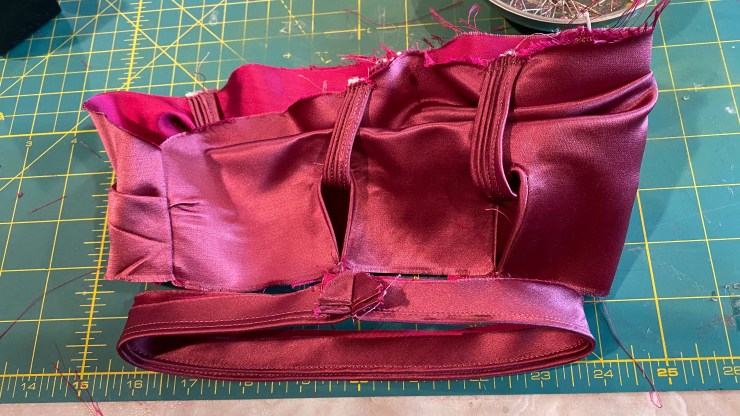
I then gathered the top, sewed it to the longer sleeve (already sewn together, seams ironed flat, turned inside out, lined, and ready to go), BEFORE i sewed it onto the bodice.
I know I’m showing the same images again but after reading (or scrolling through) all that, I hope you have more respect for how much time and effort this took. 😀
Then I sewed the lining together out of some linen remnants I had lying around the house, ironed it flat, and then pinned it to the inside. For the sleeves, the sleeves are already lined before I add them to the bodice, and I clip the sleeve edging, iron it flat to the bodice, then use the bodice lining to clean the edges.


Using tiny whip stitches, I sew everything together.


Then I used totally not historically accurate clips to the bodice so I could close it up properly.

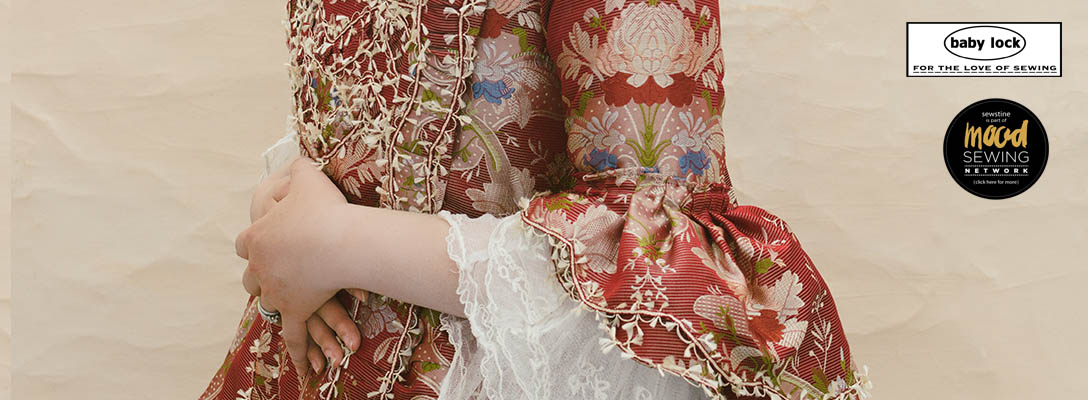
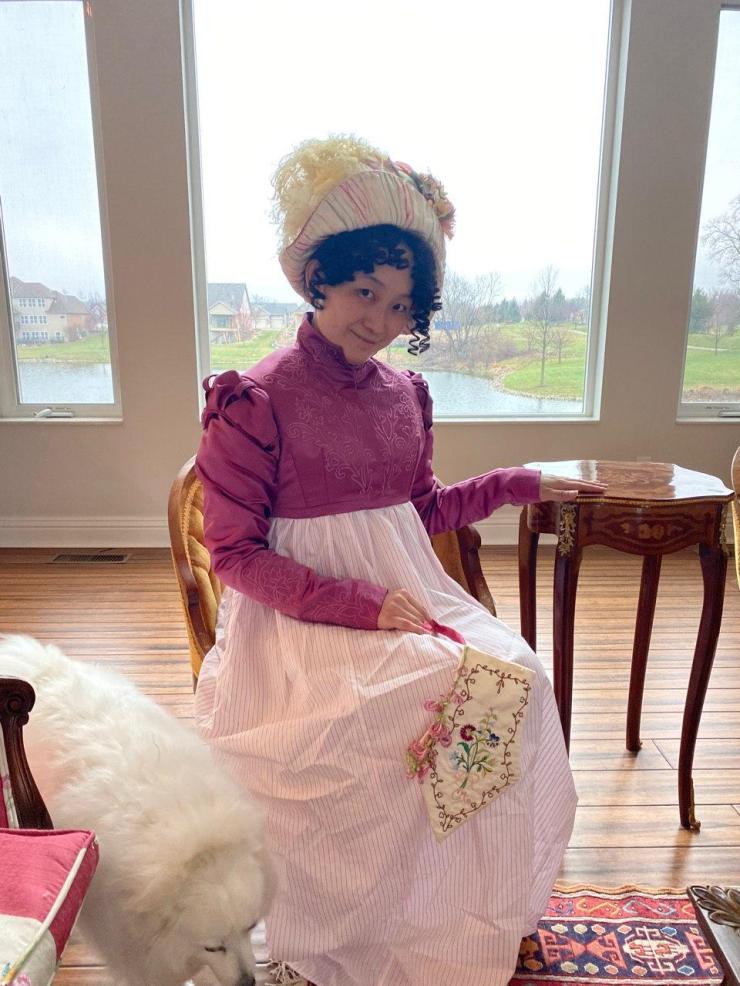
And then I was done! It’s actually really hard to appreciate this outfit without the whole of the outfit, so here I am wearing it, complete with bonnet and parasol.


Thank you so much for getting all the way down here! As a thank you, The Spencer Embroidery Files are here if you want to make your very own! They’re designed for machines with larger hoops, so it may or may not work on yours. It’s in PES so you may have to convert them. My digital files were made for a pattern size 10, but I’m fairly sure it’ll fit with other sizes – though you may have to adjust the bck to fit the back curve for other sizes.
Please purchase the jacket pattern here from Black Snail Patterns if you want to use the same spencer pattern I used.

Leaving you with a picture of my dog photobombing my shoot. 🙂
FYI: For those of you interested in my accessories:
My reticule was made by my pattern. The fly fringe was made using instructions from Romantic Recollections.
The Corset I’m wearing is the Redthreaded corset.
I’m wearing American Duchess shoes(not shown).
The fabric for the spencer is from Renaissance fabrics.
The fabric for the gown is from Vaune.com.
The hair piece (bangs) is from Jenny La Fleur.

This is absolutely gorgeous, Christine! I’ve been putting off making a spencer; you have inspired me!
LikeLike
Gorgeous!
Oh how the grass is greener. I have the exaggerated shape and I keep sighing how the pretty Regency dresses do not go straight down on me like they should.
LikeLike
Beautiful work. I thoroughly enjoyed reading how you created this wonderful garment. Thank you for sharing.
LikeLiked by 1 person